RECENT POSTS

Baby Spindle Announcement and Gender Reveal shoots

Well not too long ago we found out that we would be having a little one coming at the end of November... After the excitement/shock wore off we started brainstorming on how to announce our news. Most people who know us could have guessed that we would use our dogs in one way or another, but who would've thought we would transform Smitty into a great white STORK!!! 

I am lucky that I married such a crafty lady because believe or not you can't really find stork costumes for dogs! So off to Hobby Lobby we went and after some quick work with feathers, foam paper, and a hot-glue gun we had ourselves something to work with. For the background we used a blue twin bed sheet and for the clouds we used the guts from a cheap pillow!

Now for studio prep in our tiny Houston apartment... 

As you can see above, this is a very well put together "studio": backdrop tapped to the mantle and my umbrella just resting on the couch... I mean who needs 2 light stands anyway? I don't remember what my flash settings were but I just put them on manual and played with the powers until I got it how I wanted it.  

Next was the model placement... 

I had my lovely assistant kindly ask the model to "STAY". Which is easier said then done for sure! 

My framing was pretty wide, so it included a lot of junk around the backdrop, but that was easily cropped out afterward. So below is the shot we used...

We were pretty happy with the result, considering how hastily we put all of this together. The set up could obviously be improved: ironing/stretching the backdrop, better wing position, etc. The funny thing is that there were a lot of people who didn't even realize that was a dog when we posted the picture! Smitty was an awesome model and was rewarded with a spoonful of peanut butter!


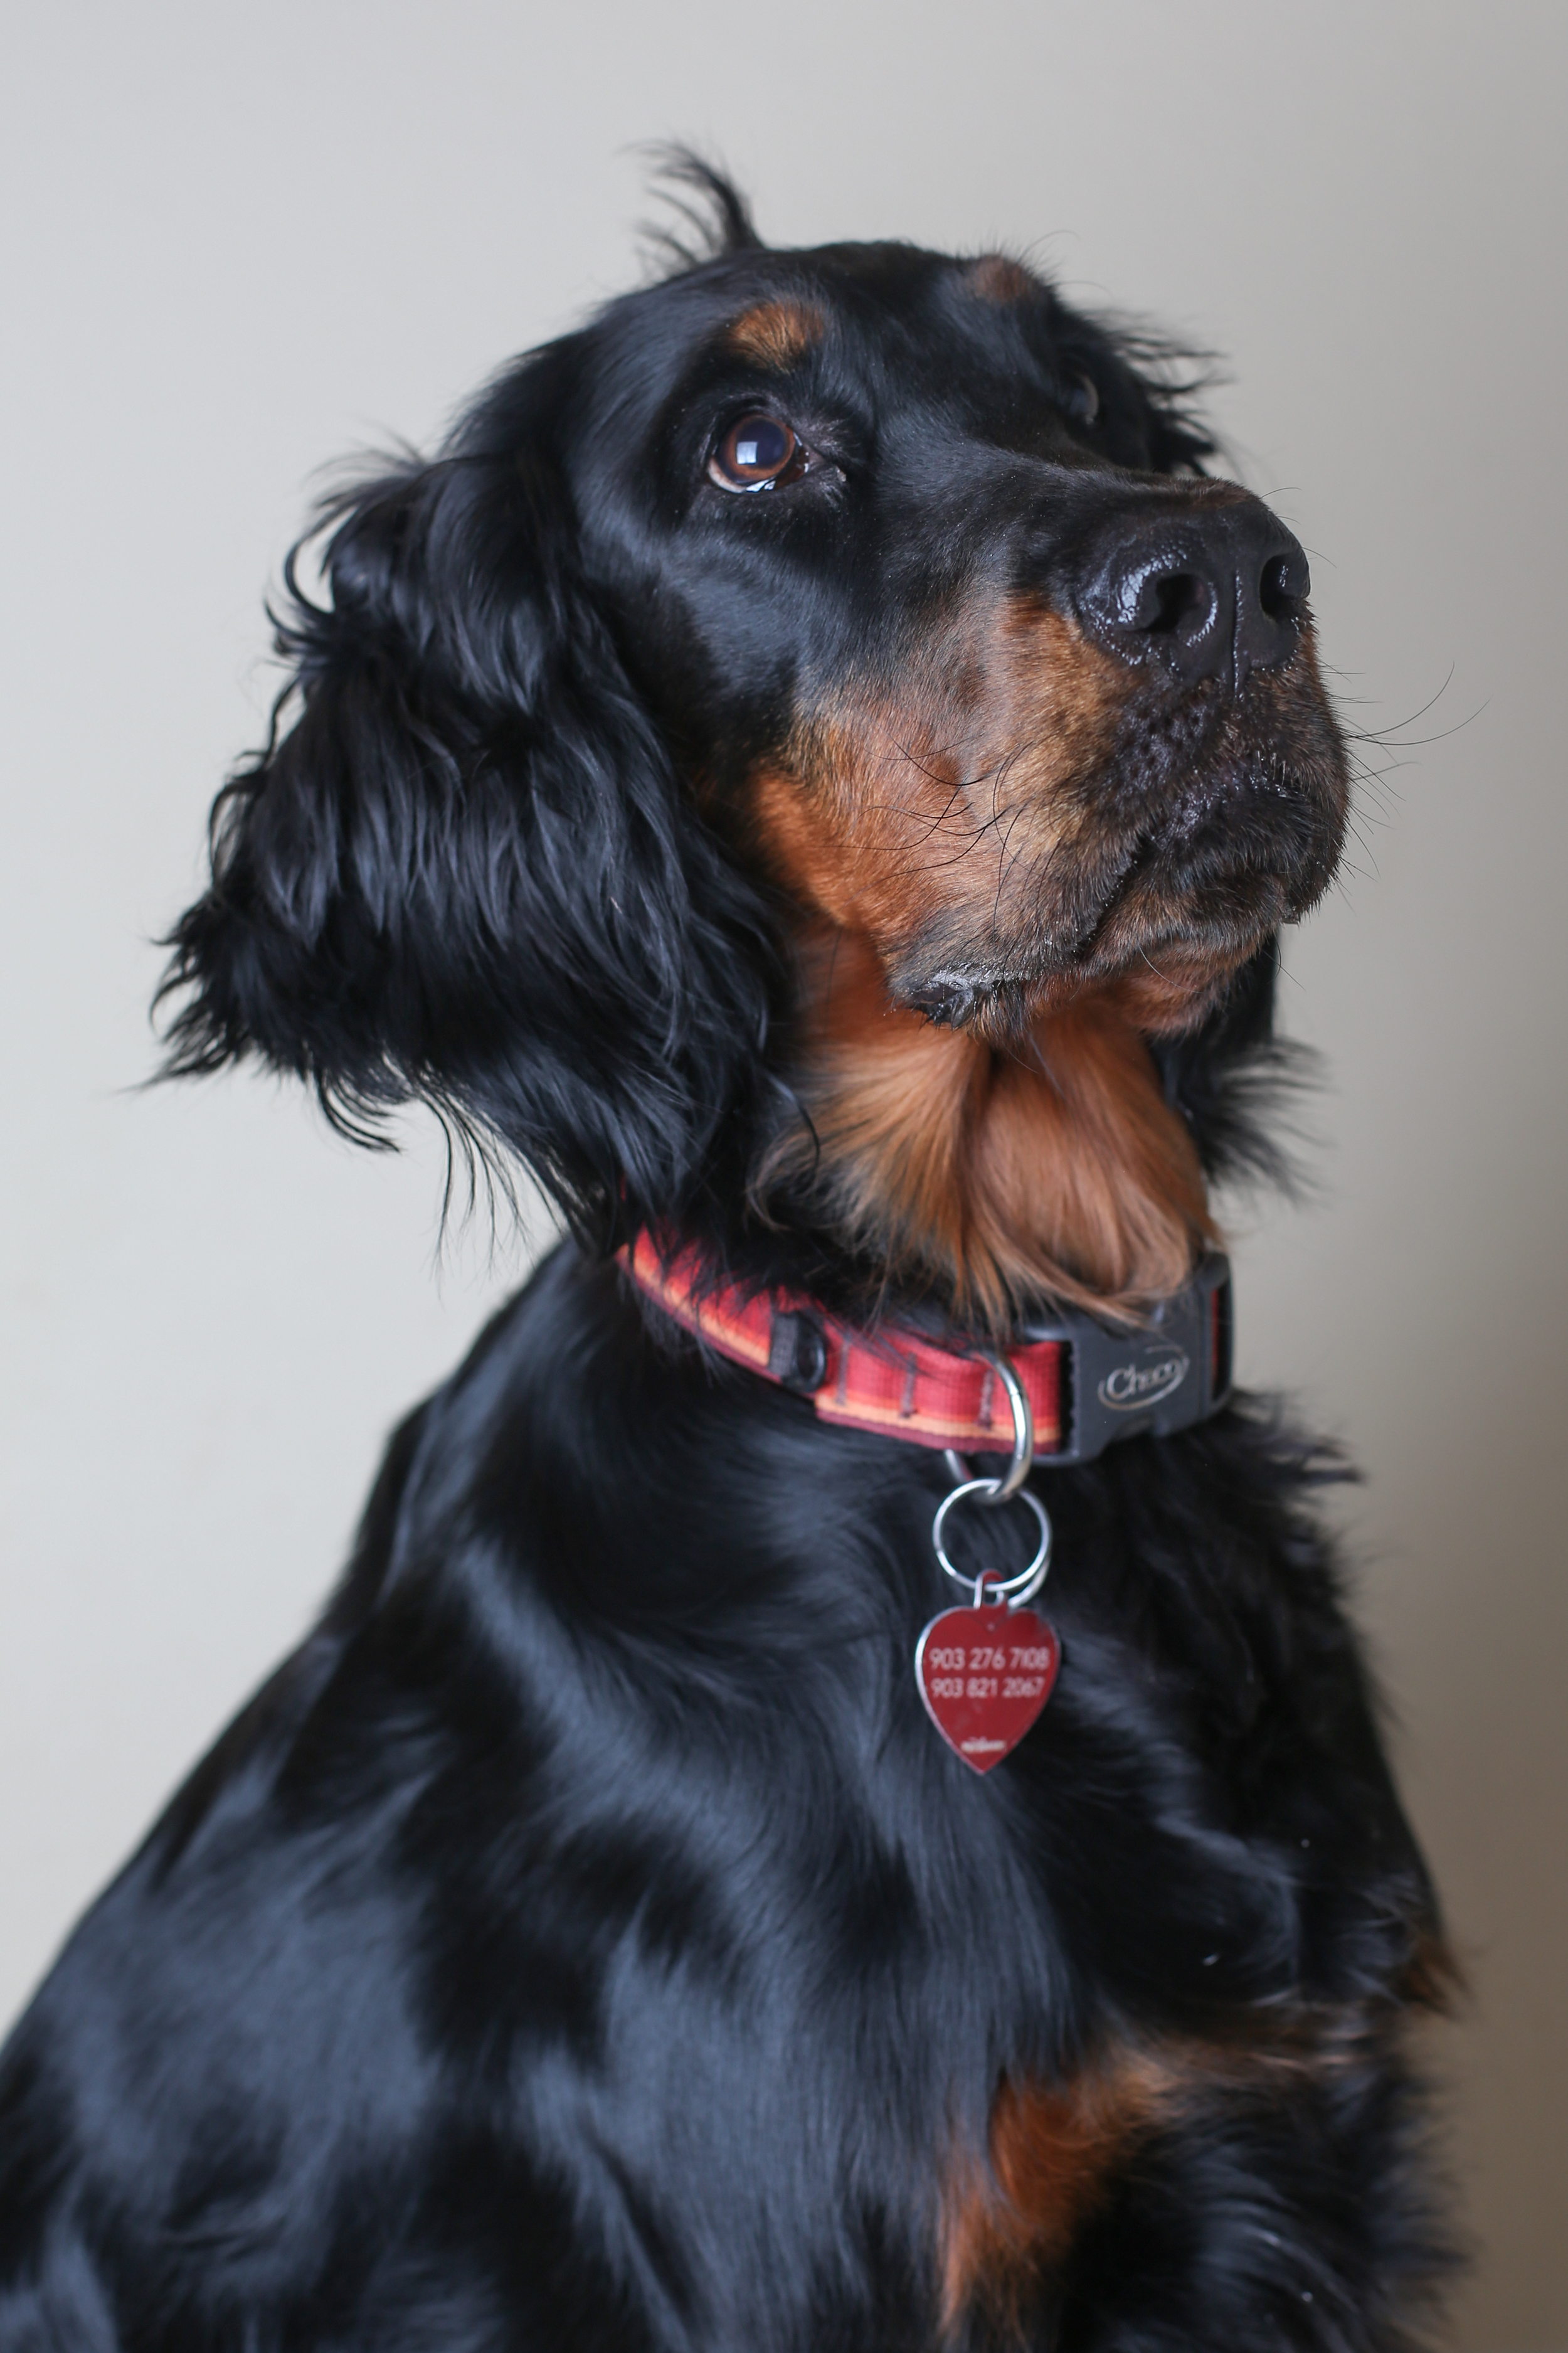
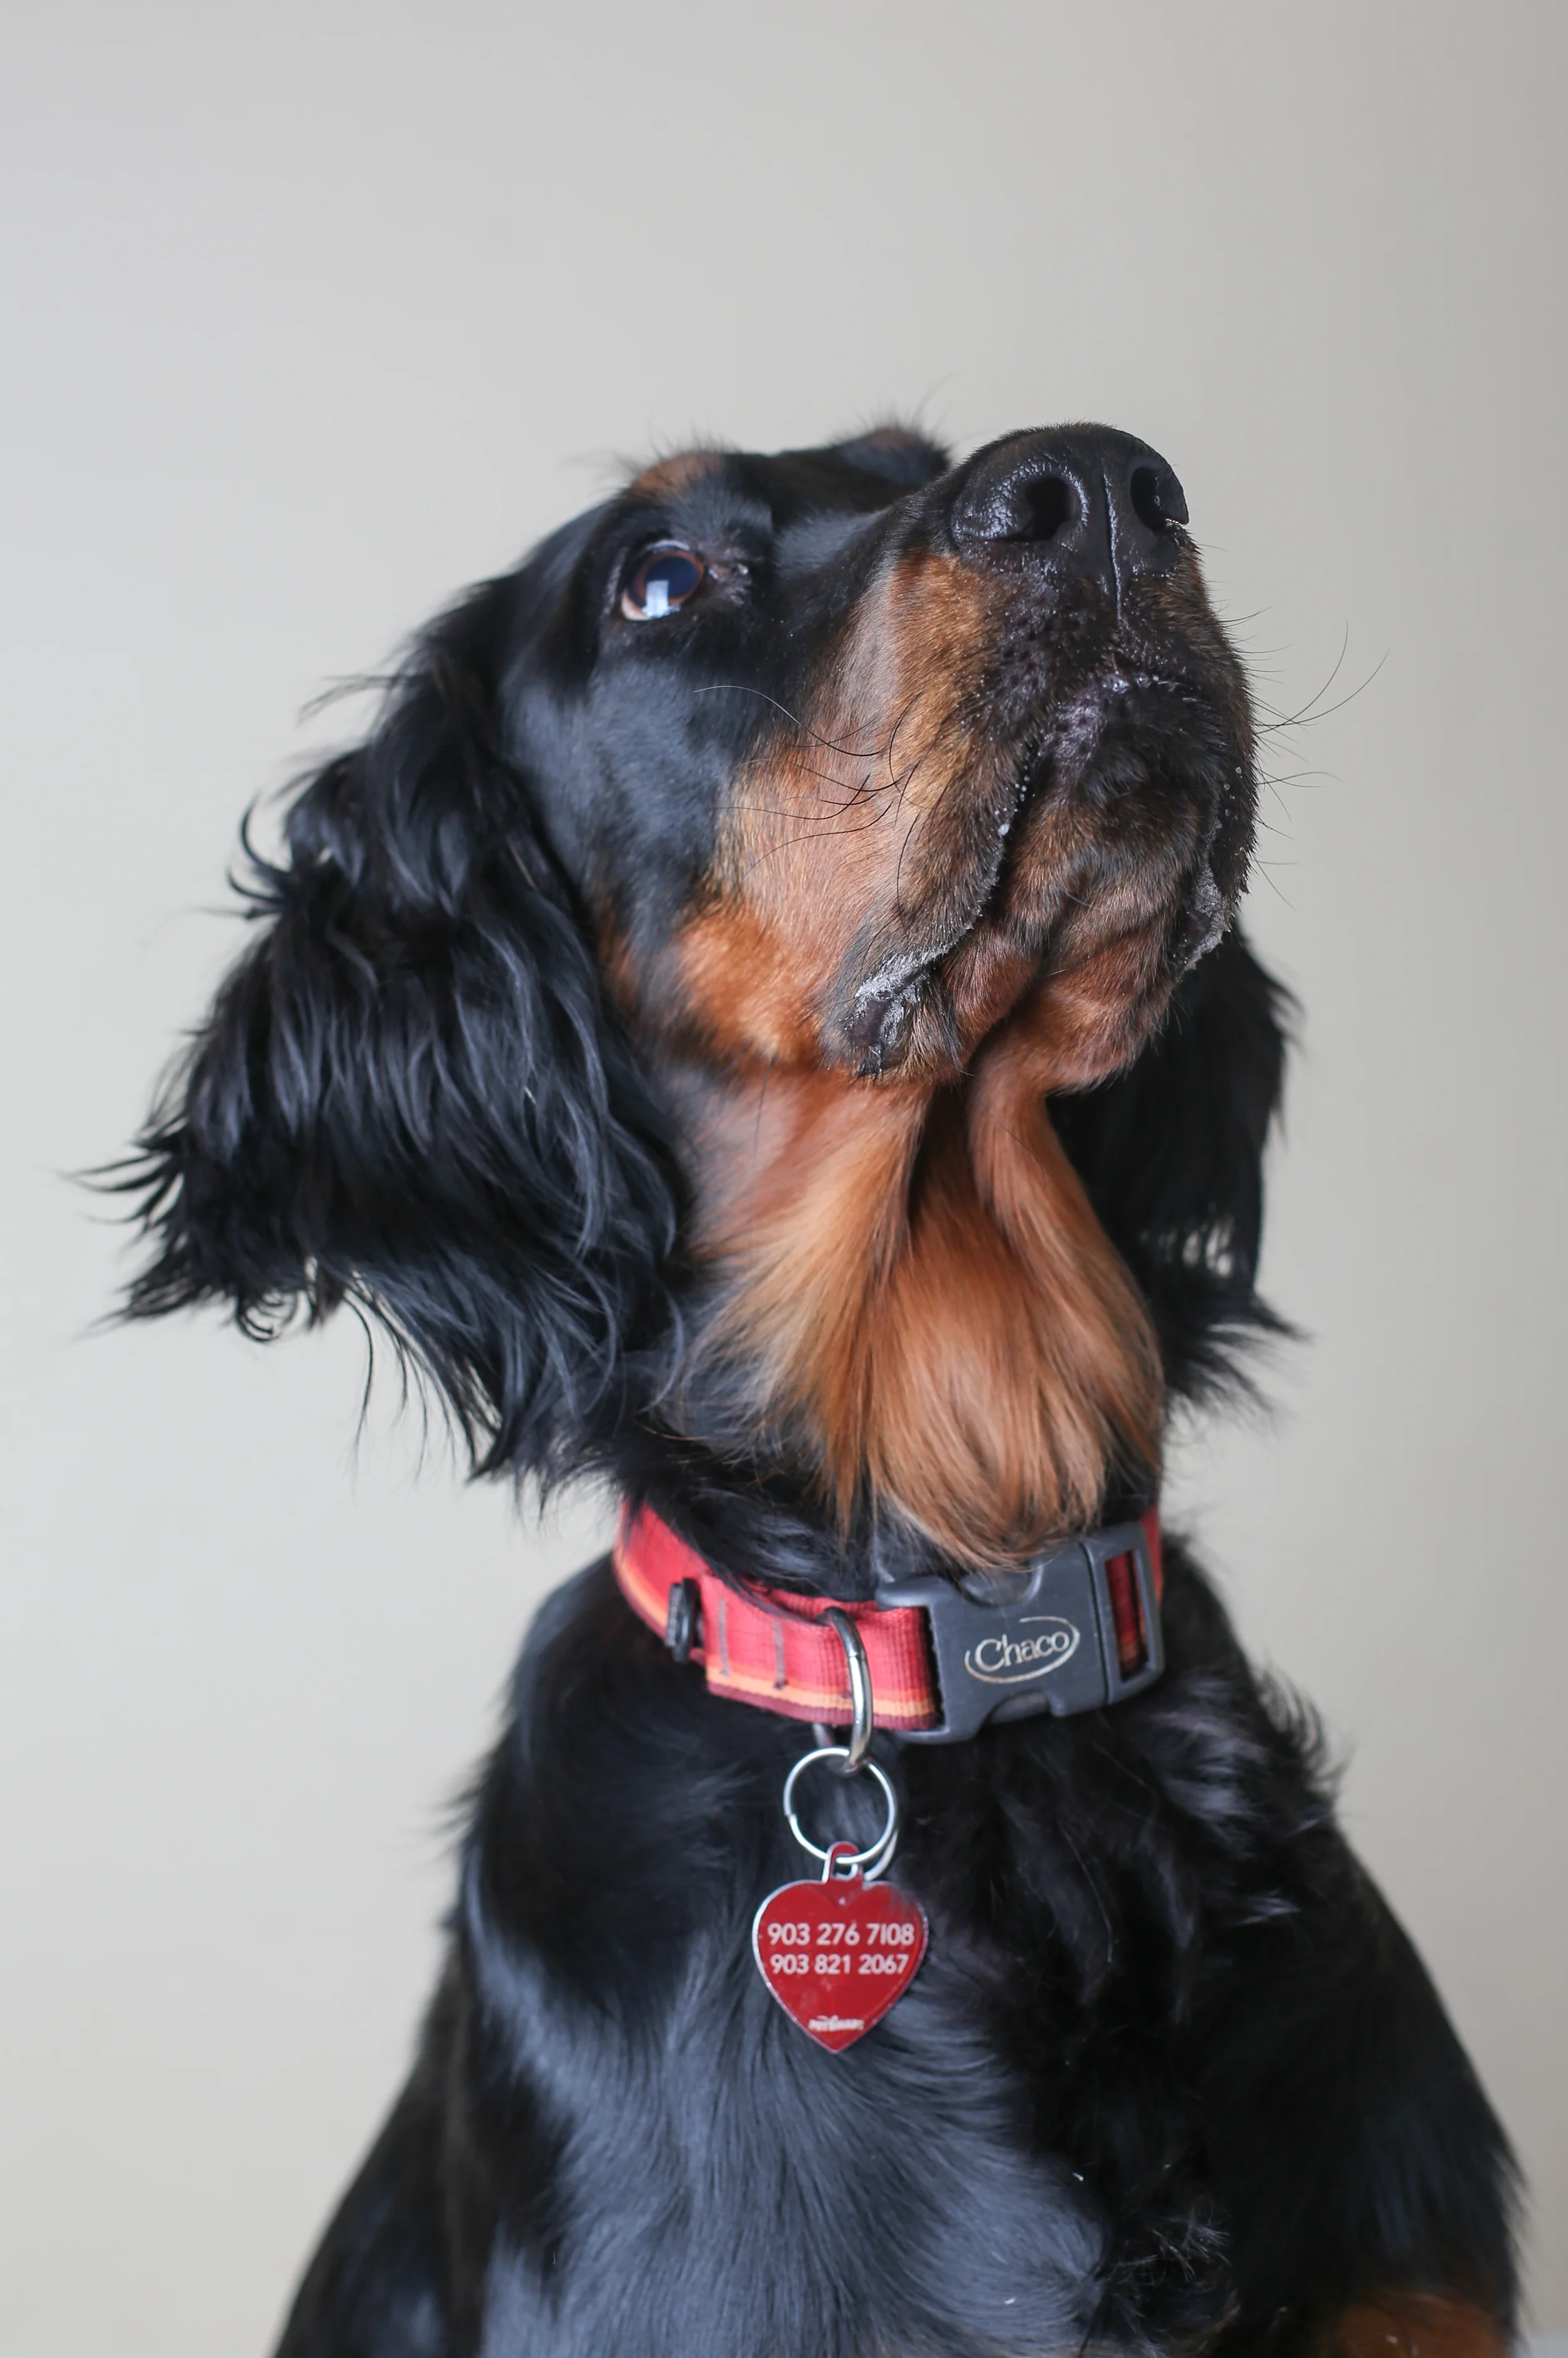
Of course it was only natural that we would use our two canine children again when it came time to reveal the gender. We actually took these pictures the night before we found out, and at this point in time we had moved out of our Houston apartment and into our house in Temple! So our "studio" took on a little different look this time around.

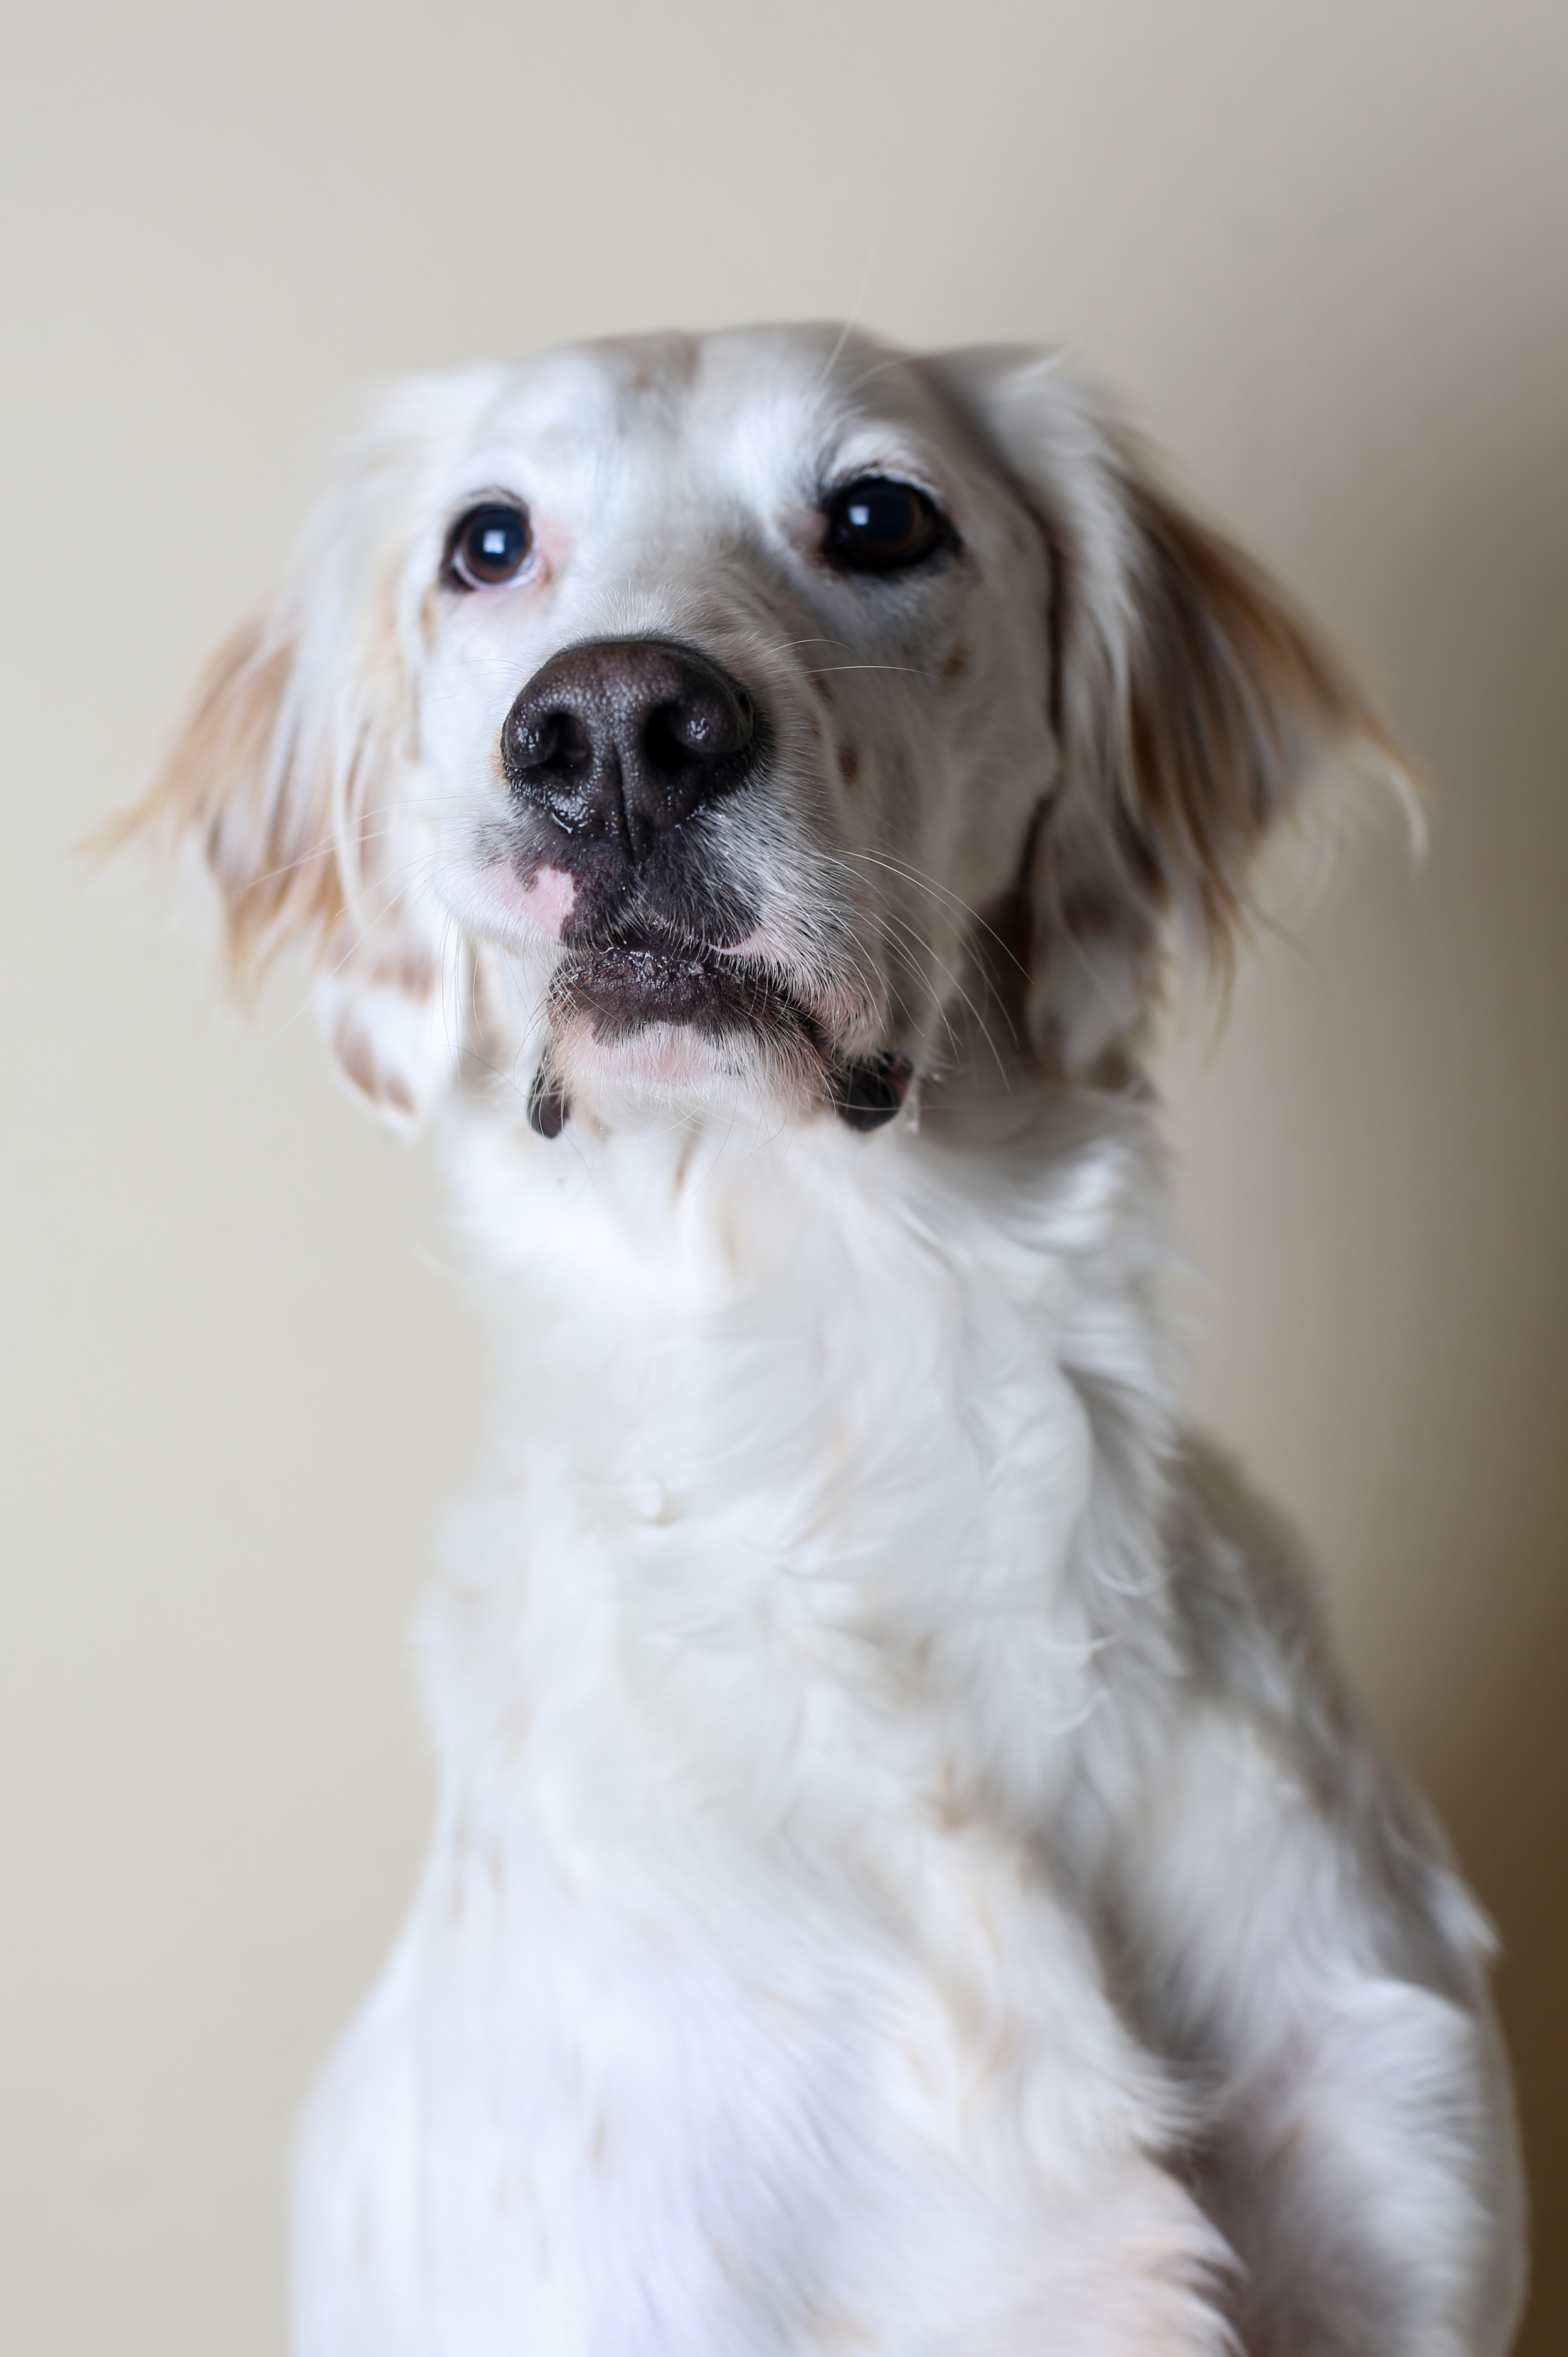
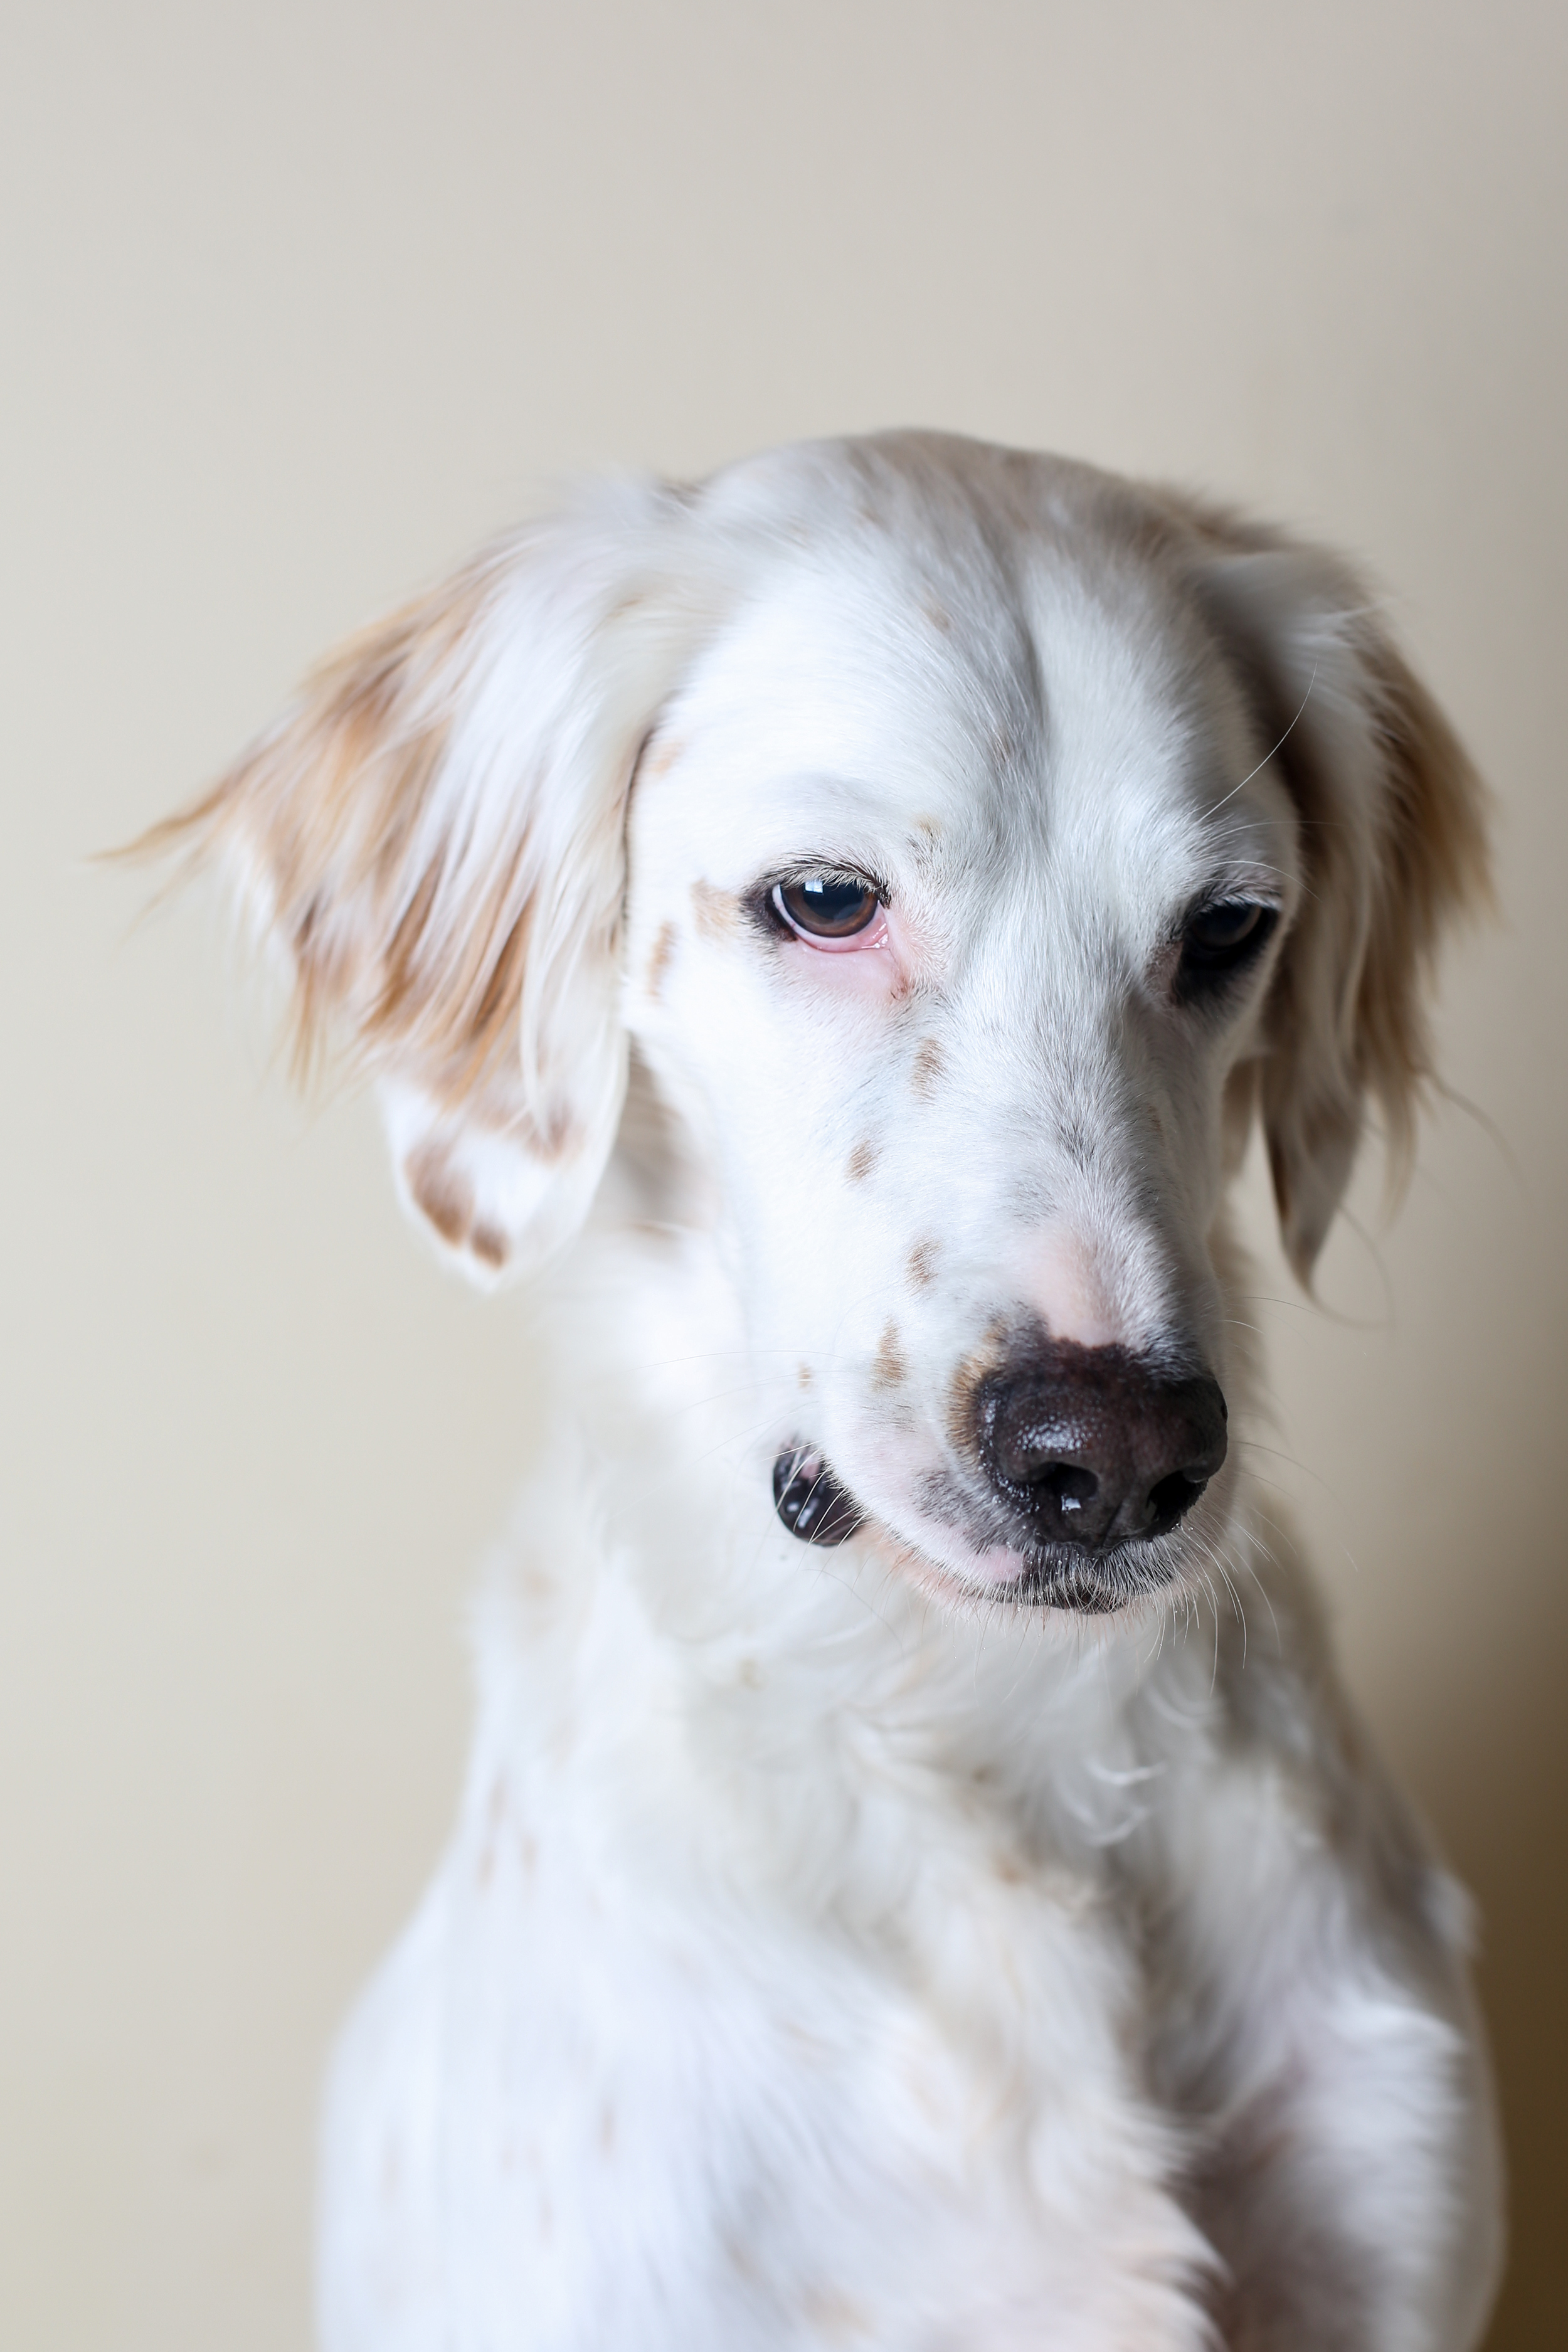
This time we just hung a white fleece blanket from a curtain rod and placed my umbrella on a spare chair. The 580EXII was in the softbox and my yongnuo flash was just laying in the chair and reflecting off the inside of the umbrella. It obviously takes a little while to get the right shot, below are a couple of interesting captures along the way...

Finally we got a couple we liked...

Lauren posted these to Facebook and asked people who they thought would win. Team Smitty vs Team Wendy... later that night after many confident wrong and right guesses, the answer was revealed! We are having a BOY!!!

Will Model for Food

Well I found myself a little bored tonight and decided to practice/experiment with some off camera flash. So I armed myself with a speedlight, yongnuo triggers, a westcott apollo 28" softbox, a reflector, my camera, and most important of all.... DOG TREATS! ​With the addition of the last item on my list I instantly had 2 willing and motivated models at my disposal!

​Considering our logo is a bird dog (hopefully that explains the feather inside the point dog), inspired by our two setters, it seemed necessary that they should each have some proper portraits! 

Here they are lined up and ready to go as I tested to make sure my flash was synced!

(Left)- Wendy, our Gordon Setter  (Right)- Smitty, our English Setter

Below is a gallery of their portraits, enjoy!

Next time we may have to have a hair stylist on set for Wendy.

Camera Lesson

Understanding Your Camera: A lesson in aperture, depth of field, exposure and shutter speed.

Your photography will change for the better as soon as you can get away from the “automatic” modes on your camera. Hopefully with this tutorial you will be able to better understand how your camera thinks and how you can use it to create the images you've always wanted.

Specifically I want to teach you how to use the “Av” mode on your camera. This stands for aperture priority, which means that you are in control of the aperture and the camera does the rest of the work for you. This lesson comes with pictures, but first we have to go over a few simplified definitions.

Exposure: amount of light allowed to fall on the camera’s sensor during a photograph

-Decreasing the exposure makes pictures darker and increasing exposure makes them brighter

Aperture: the hole or opening through which light travels (displayed as a “f” followed by a number)

-A large aperture (big hole) is denoted by a small “f” number. A small aperture (small hole) is denoted by large “f” number. For example f1.4 is a large aperture and f16 is a small aperture  

Shutter speed: amount of time the camera’s sensor sees the light (displayed seconds)

Depth of field (shallow): only what you choose to focus on will be in sharp focus

Depth of field (deep): all objects in the photograph are in sharp focus

Here is a representation of the different apertures. Remember that these are located within your lens, not the camera itself, and not all lenses have really large apertures. Your lens will have largest aperture capable printed on it somewhere.  


edited.jpg

Okay, so why would we want to change the aperture and what happens when you do? Well it’s time to combine a few of those definitions, so if you get lost just refer back to the top.  

Every time you take a picture your camera thinks about how it can make the image at the exposure that you set. In most instances your exposure is set to “0” as shown below.

IMG_0801-001.jpg

So with each picture your camera is gathering the amount of light required to make a “0” image for you. So how does aperture and shutter speed come into play?

Think of it like this… you have a milkshake that you need to drink and you have the choice of two straws. One of the straws is really fat (f1.4) and the other is really skinny (f16). Now with both straws you will be able to drink all of your delicious milkshake, but you will be able to do it a lot faster if you choose the fat straw over the skinny one.

Photographs work the same way. Choosing a large aperture (f1.4) means that the camera will give you a really fast shutter speed and choosing a small aperture means that the shutter speed will have to be slower in order to “drink” the same amount of light. Here are some pictures to show what I mean.

camera lesson edited.jpg

In these pictures I was focused on the mug and was in “Av” mode; don't pay attention to the ISO setting (that is for another day) . I was only in control of the aperture and the camera chose the shutter speed for me. The top picture was taken with the largest aperture (f1.4), so the camera set the shutter speed to 0.02 seconds. As you can see when I decreased the aperture to f4, f8 then f16 the camera had to slow down the shutter speed each time in order to drink up all the light that I wanted it to.

From these series of images we can also learn about depth of field. As the aperture went from large (f1.4) to small (f16) the depth of field got deeper. In the first image with the aperture set to f1.4, only the mug and the other things at the same distance from the camera were in focus. As I moved the aperture to f4 you can start to see that the pumpkin in the background is getting a little sharper, but the backdrop is still out of focus. At f8 the backdrop gets a little sharper and by f16 the objects at all distances from the camera are in sharp focus.

But what happens if you change the exposure away from the “0”? By moving it to the left (towards the negative numbers) you are saying to your camera that you want the picture to be darker and by moving it to the right (towards the positive numbers) you are saying you want your pictures brighter. Take a look below… the left hand column is set to an exposure of (-1) the middle at (0) and the right hand column is set to (+1).

camera lesson edited.jpg

As you go down each column the aperture is getting smaller, so just like in the first example the shutter speed is slowing down. Yet you can also see that each row has the same aperture, but the shutter speed is getting slower as you move to the right. Why is this happening if my “straw size” isn’t changing? Well by setting the exposure to “-1” you are only getting a small milkshake, at “0” you get a medium, and at “+1” you get a large. So yes you have the same size straw for each milkshake, but you can finish a small milkshake a lot faster than you can finish a large.

That’s all nice and fancy, but how is all that info practical when I go out and start taking pictures?

  • Is your background ugly or boring? If yes, then make your aperture larger so that your background is not in focus.
  • Getting blurry pictures because your shutter speed is too slow? Make your aperture larger so that you can drink up that light faster and your pictures won’t be blurry.
  • Taking a group picture and the people in the back aren't in focus? Decrease your aperture so that everyone will be in focus.   

I hope that you were able to learn some camera basics from this tutorial! There is a lot more to learn, but everyone has to start somewhere! If you can grasp the concepts above, then you are well on your way to mastering your camera!

All images above were unedited and taken with a 5D Mark III with a Canon 50mm f1.4 lens.


Long Exposures and Spinning Steel

I had been wanting to try my hand at long exposures with burning steel wool for a while now, but I figured in Houston that might not go over too well. Luckily we visited the Clevenger Farm in Avery, Texas this past weekend so I had my opportunity to shoot away without any worries... or so we thought.

I will tell you the technical aspects of the shots in a minute, but the real adventure was really the preparation itself. We (Lauren and I) wanted to be standing on a dock when flinging the flaming steel wool that way it was landing in the water and not in the grass. Our backup plan was to carry a 5 gallon bucket down to the ponds too, just in case a fire was started we could scoop up some pond water to put it out. Little did we know that the handy little bucket would be a fatal flaw in our plan.

We set out with gear in hand and started our nice chilly stroll to the first pond. The moment we went through the gate and into the pasture we were greeted with 5 hungry cows and a tag along calf. We had missed out on the little detail that in the Clevenger cow herd a 5 gallon bucket = delicious treats. Our denial of the tasty morsels left the cows perplexed and perturbed, so they followed us... closely. We picked up our pace and so did the cows to the point that Lauren frightfully whispered "I can feel it breathing on my leg!"

Finally we made it to the dock, our safe haven, but our friends had followed us all the way there and were waiting at the edge... impatiently. One even contemplated joining us out there, but a weary first hoof made it think better. At this point we felt trapped. Like a we were stuck in a tree with large angry alligators waiting for us below.

untitled-24.jpg
untitled-23.jpg

(Left) The brave photographers with whisks and spotlight in hand. (Right) Evil cows waiting for their first victim.

Lauren said "throw the bucket to them and they will see it is empty and leave". So I did, but they did not do as promised. They obviously believed I was hoarding their treats in my pockets. At the same point in time we decided we wanted to head to a different pond in a completely different field, so an exit strategy was made. We turned the "fear" tables on the cows by "testing" my steel-wool-in-a-whisk contraption and sending sparks all over the place, which gave us enough room to flee from the dock. Lauren ran ahead and I went and retrieved the slobbery bucket from the enemy before catching up to her. We narrowly escaped and managed to close a dividing gate behind us so we could go shoot at another pond in peace.

Here is what we created! Technical details are after the pictures. 


 To make these shots here is what you need:
-A whisk with the string attached to it
-Steel wool; the finer grade the better
-9V Battery to ignite the steel wool
-A safe place to shoot

Camera specs:
-You need a tripod and a shutter release will come in handy

- We used f4.0, ISO 100-400, and shutter speeds ranging from 10-30 seconds