RECENT POSTS

Vermont 2016 - Fall Foliage Tour

Lauren and I just returned from her 30th birthday trip to Vermont! Fortunately Lauren is not really in to receiving gifts for her birthday or other major occasions, in fact usually I can just take her to Home Depot to pick out some plants and she is perfectly happy. However I wanted to plan something special for her 30th and figured a fall foliage trip would do just the trick!

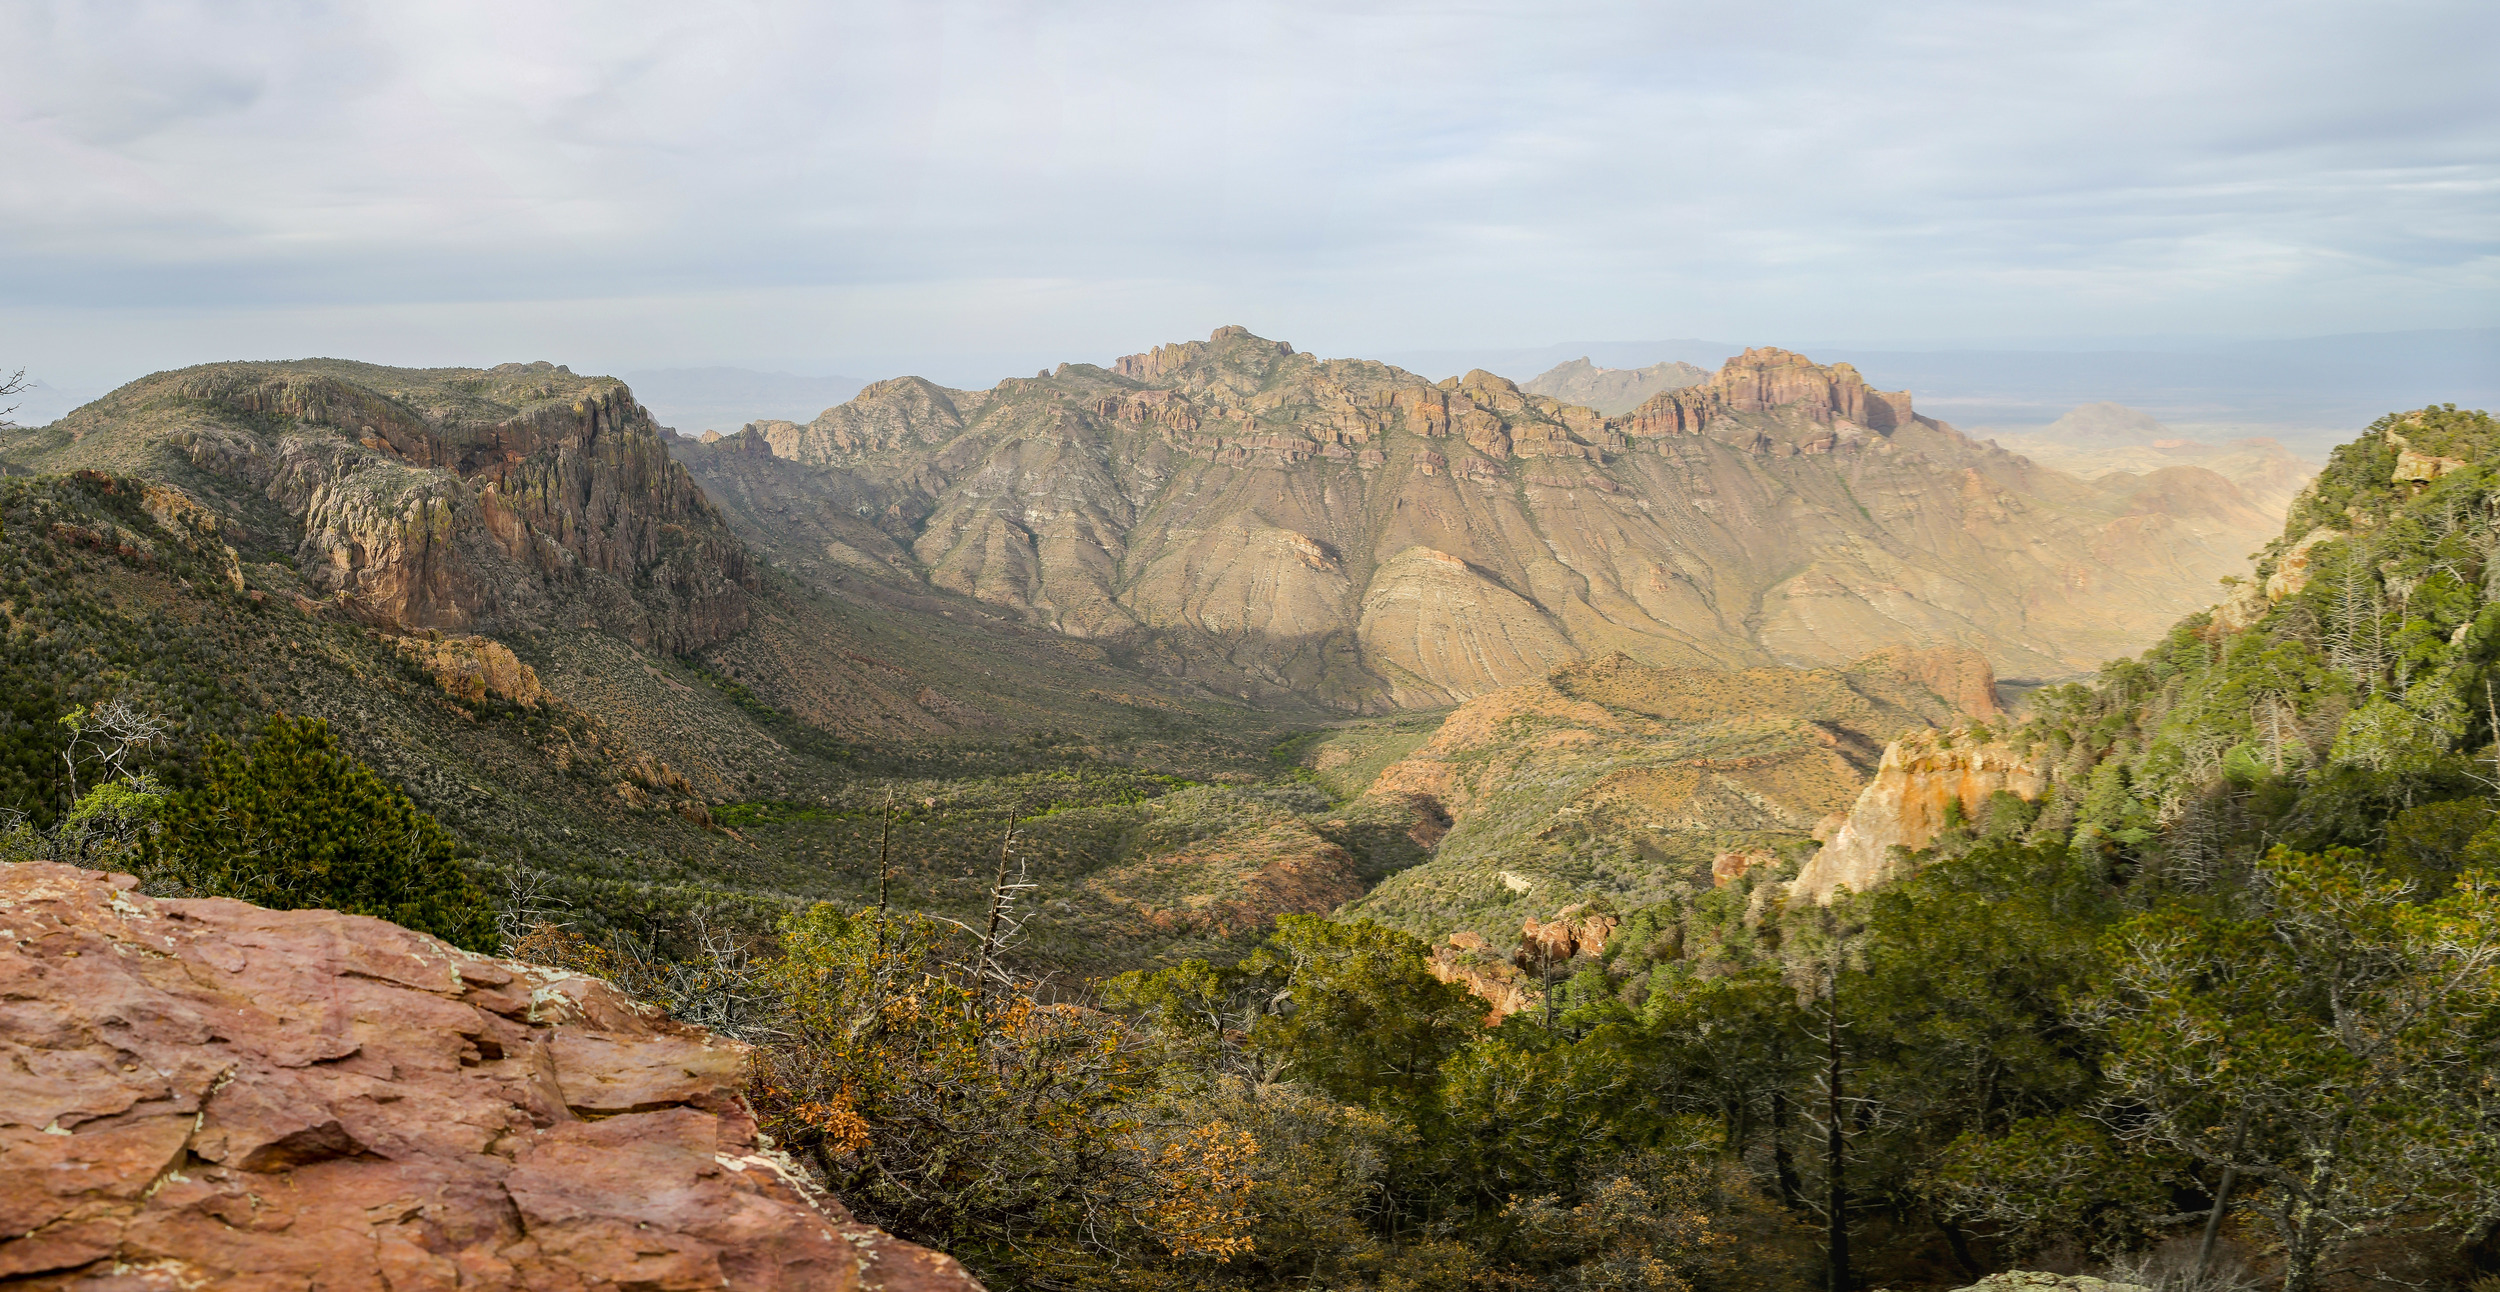
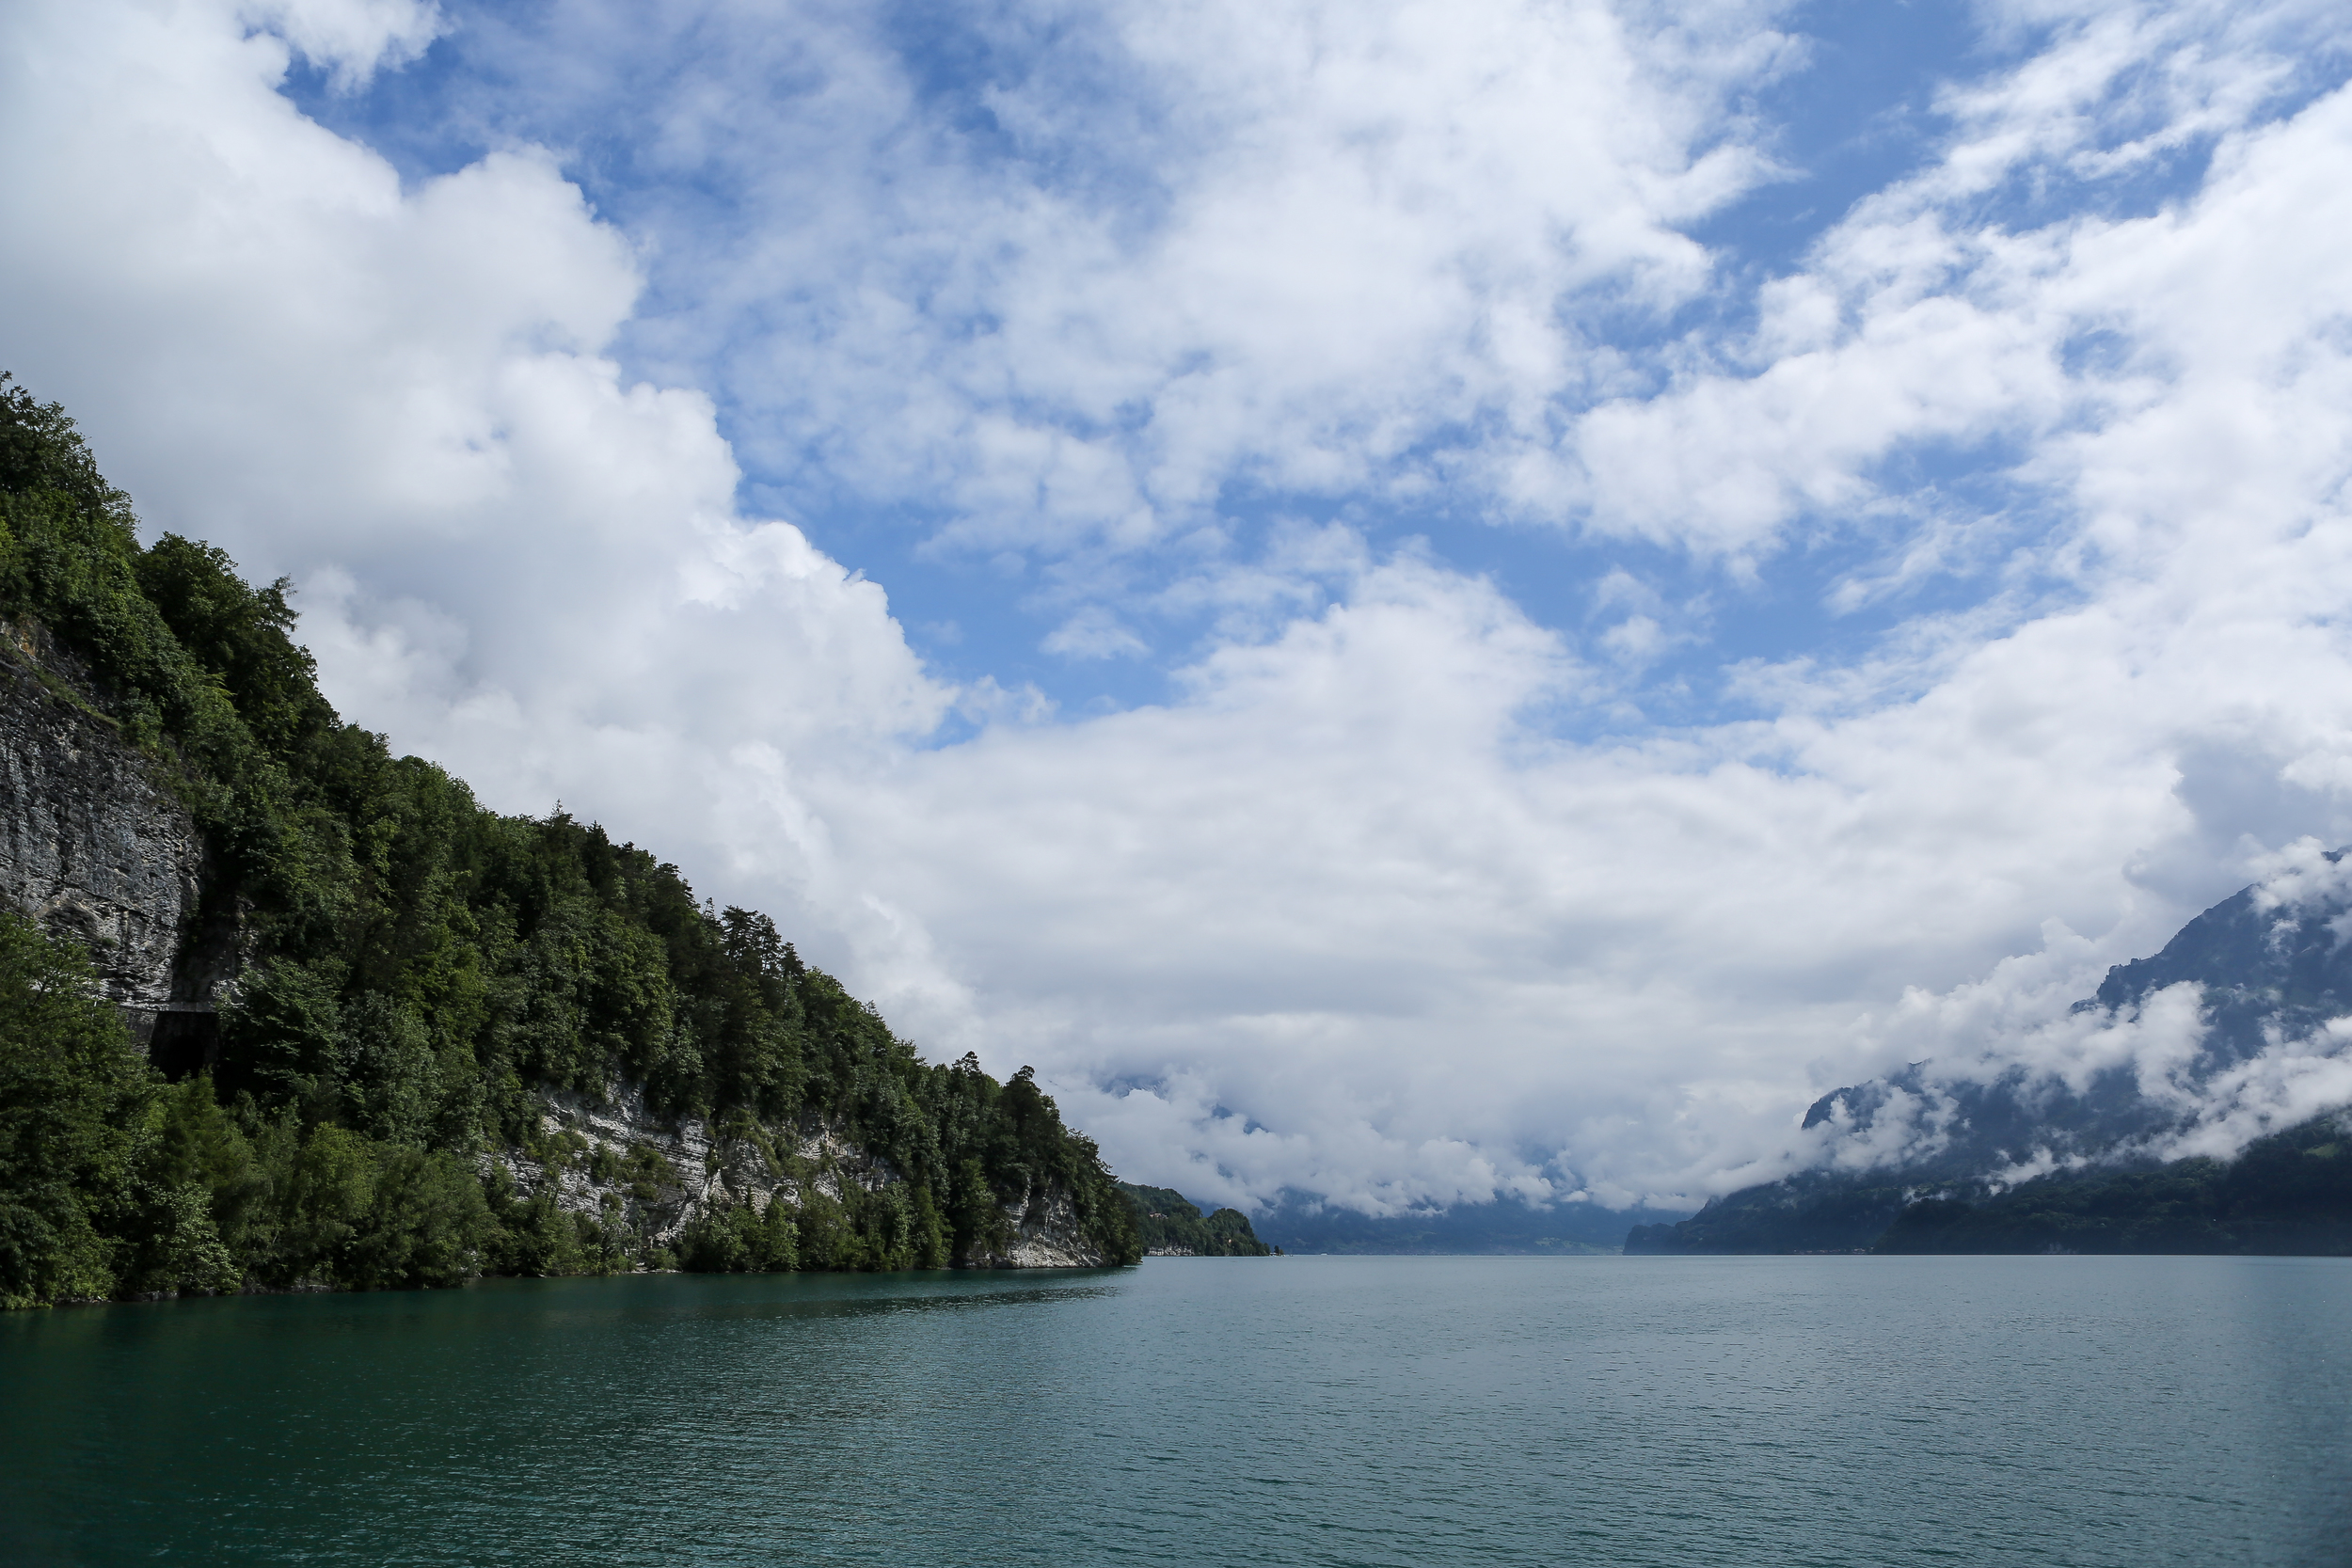
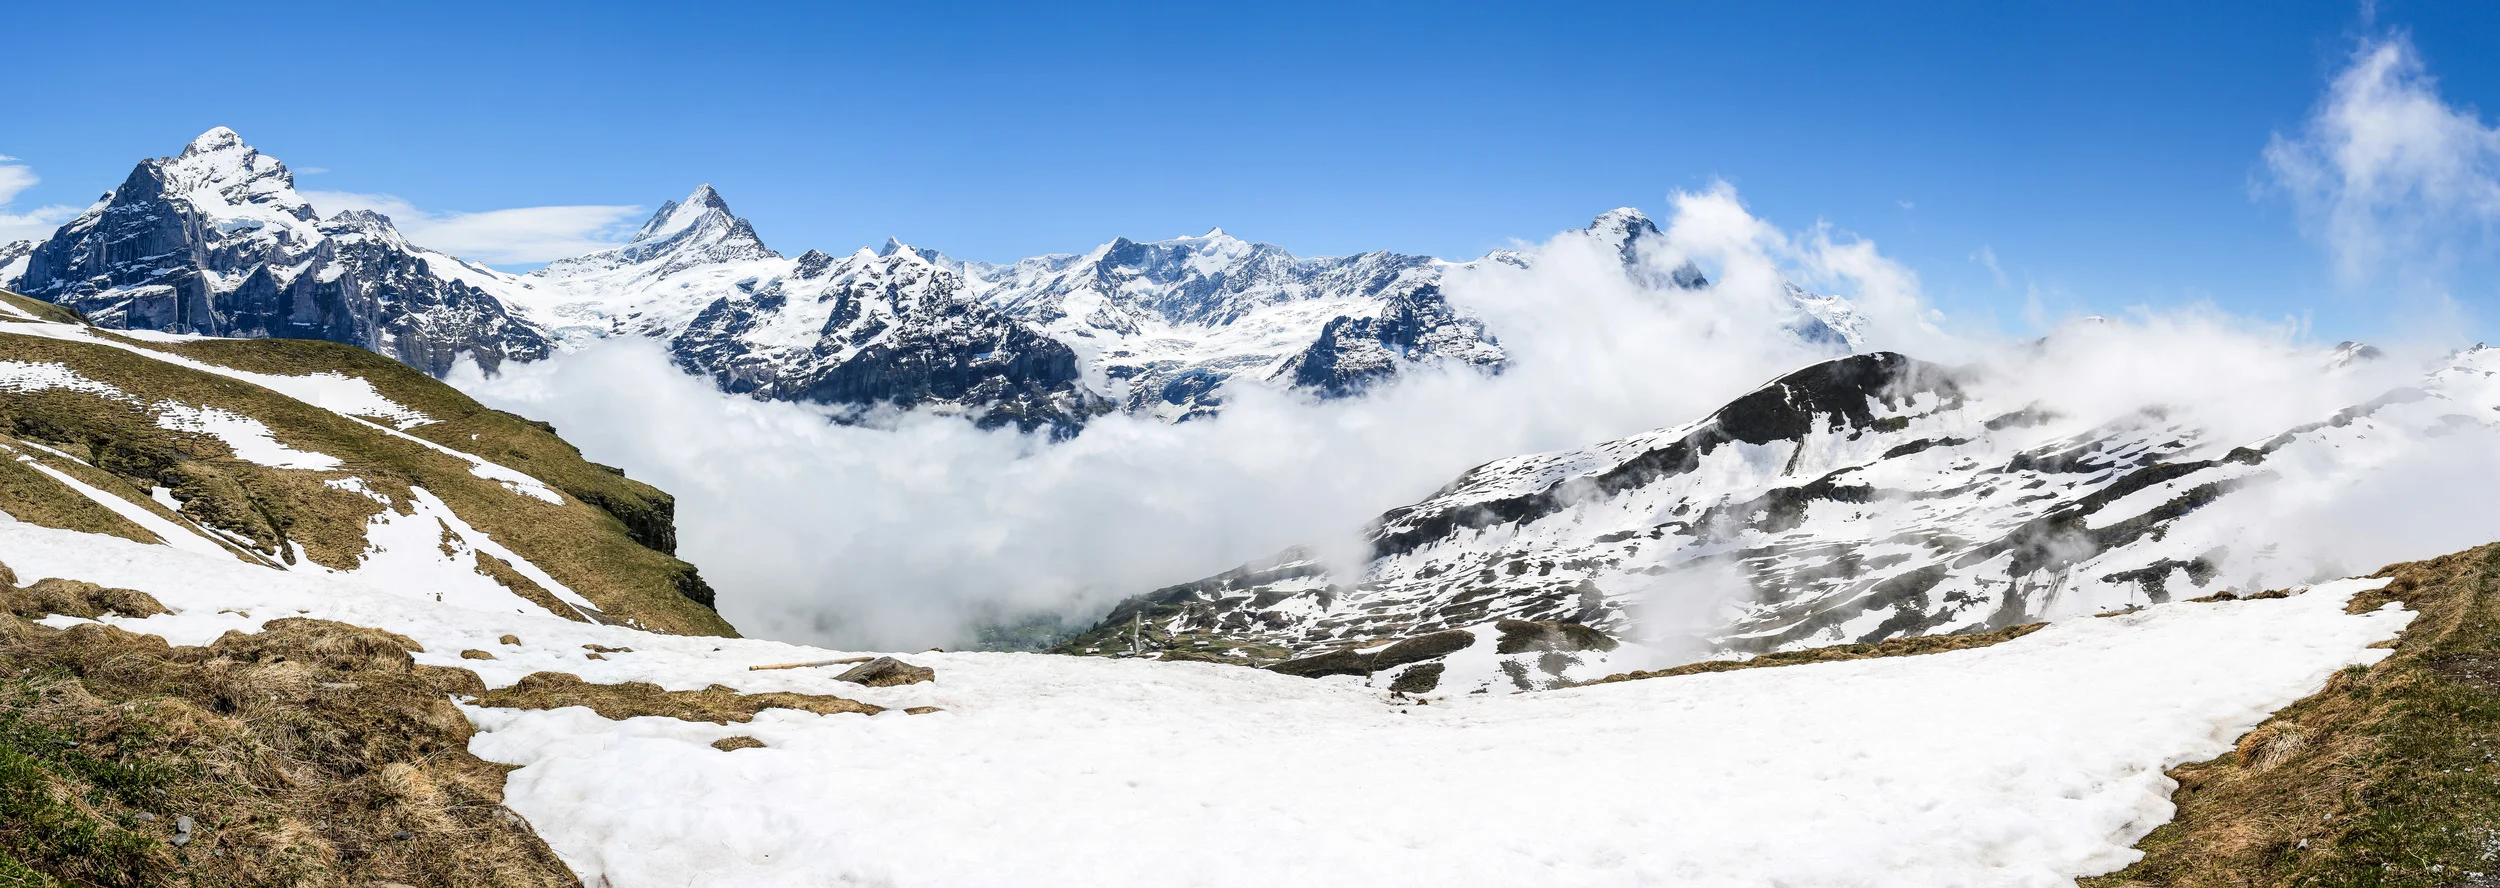
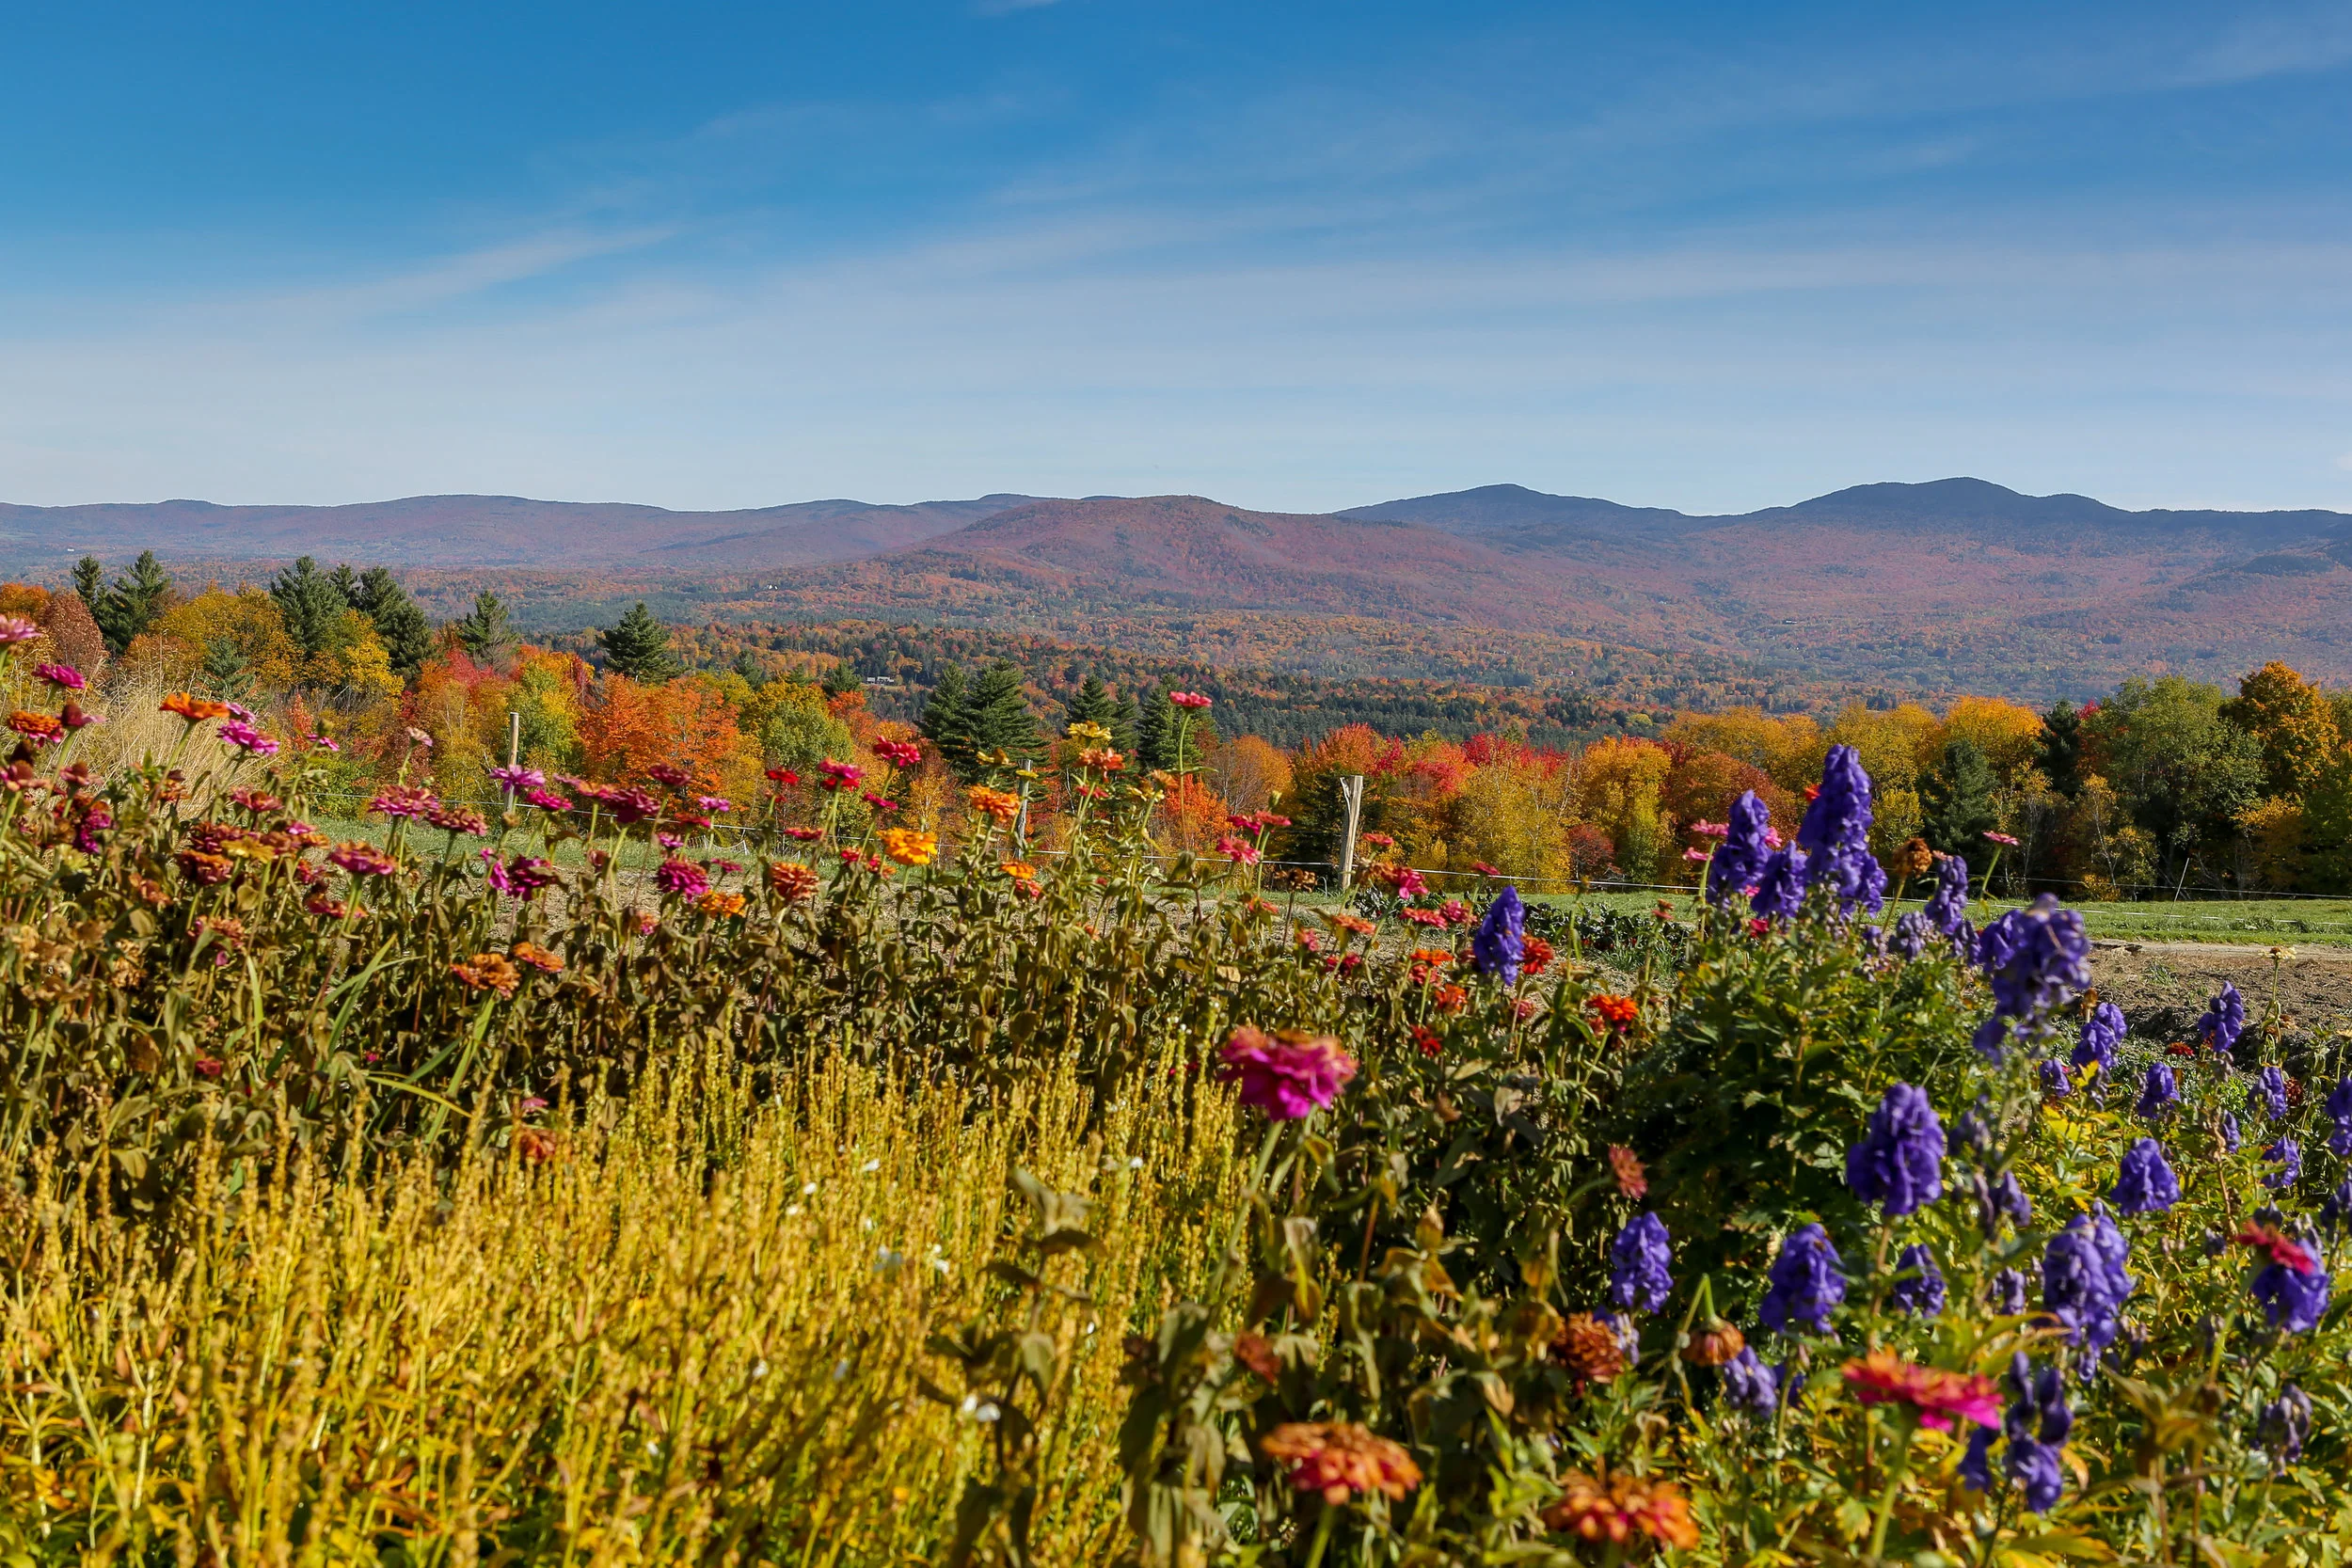
Below is a gallery of some of my favorite panoramas I created from the trip. I don't have a super wide lens, so for all of these "landscapes" I take multiple pictures with my 24-70mm lens in a portrait orientation and stitch them together in Lightroom 6. 

Continue reading for a more detailed account of our trip and more pictures! Hopefully someone will be inspired to plan a trip of their own next fall and can use our rough itinerary for a guide. 

DAY 1

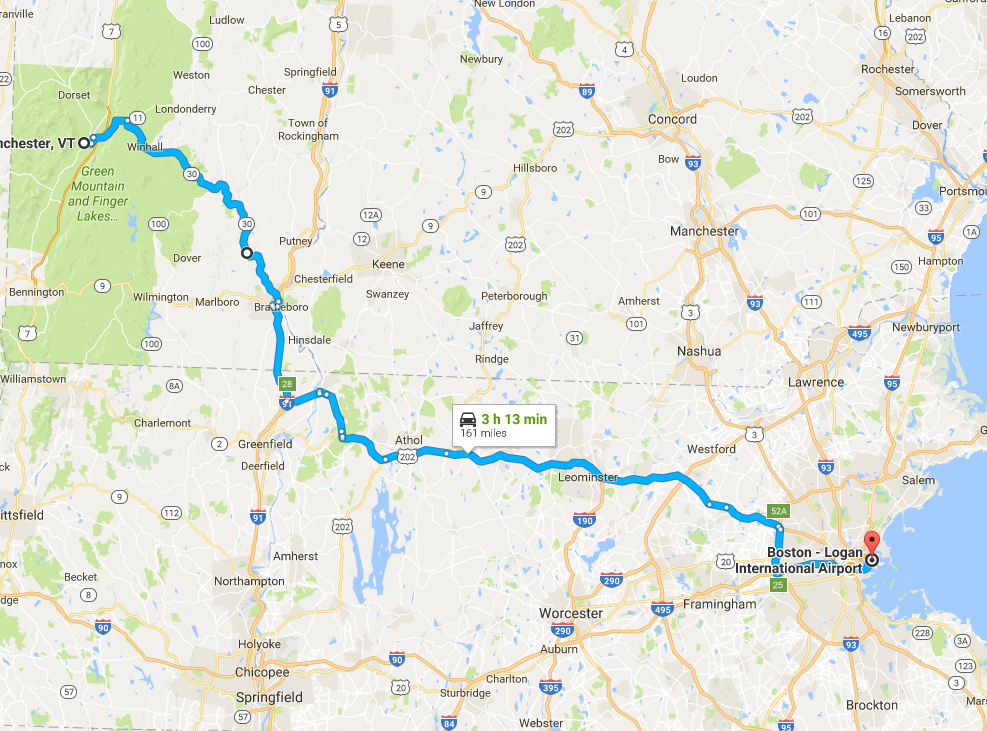
We flew into Boston on Thursday afternoon, rented a car and were on our way to Manchester, Vermont. It was raining a little bit on the drive, but we were still able to hop out and take a few pictures along the way.

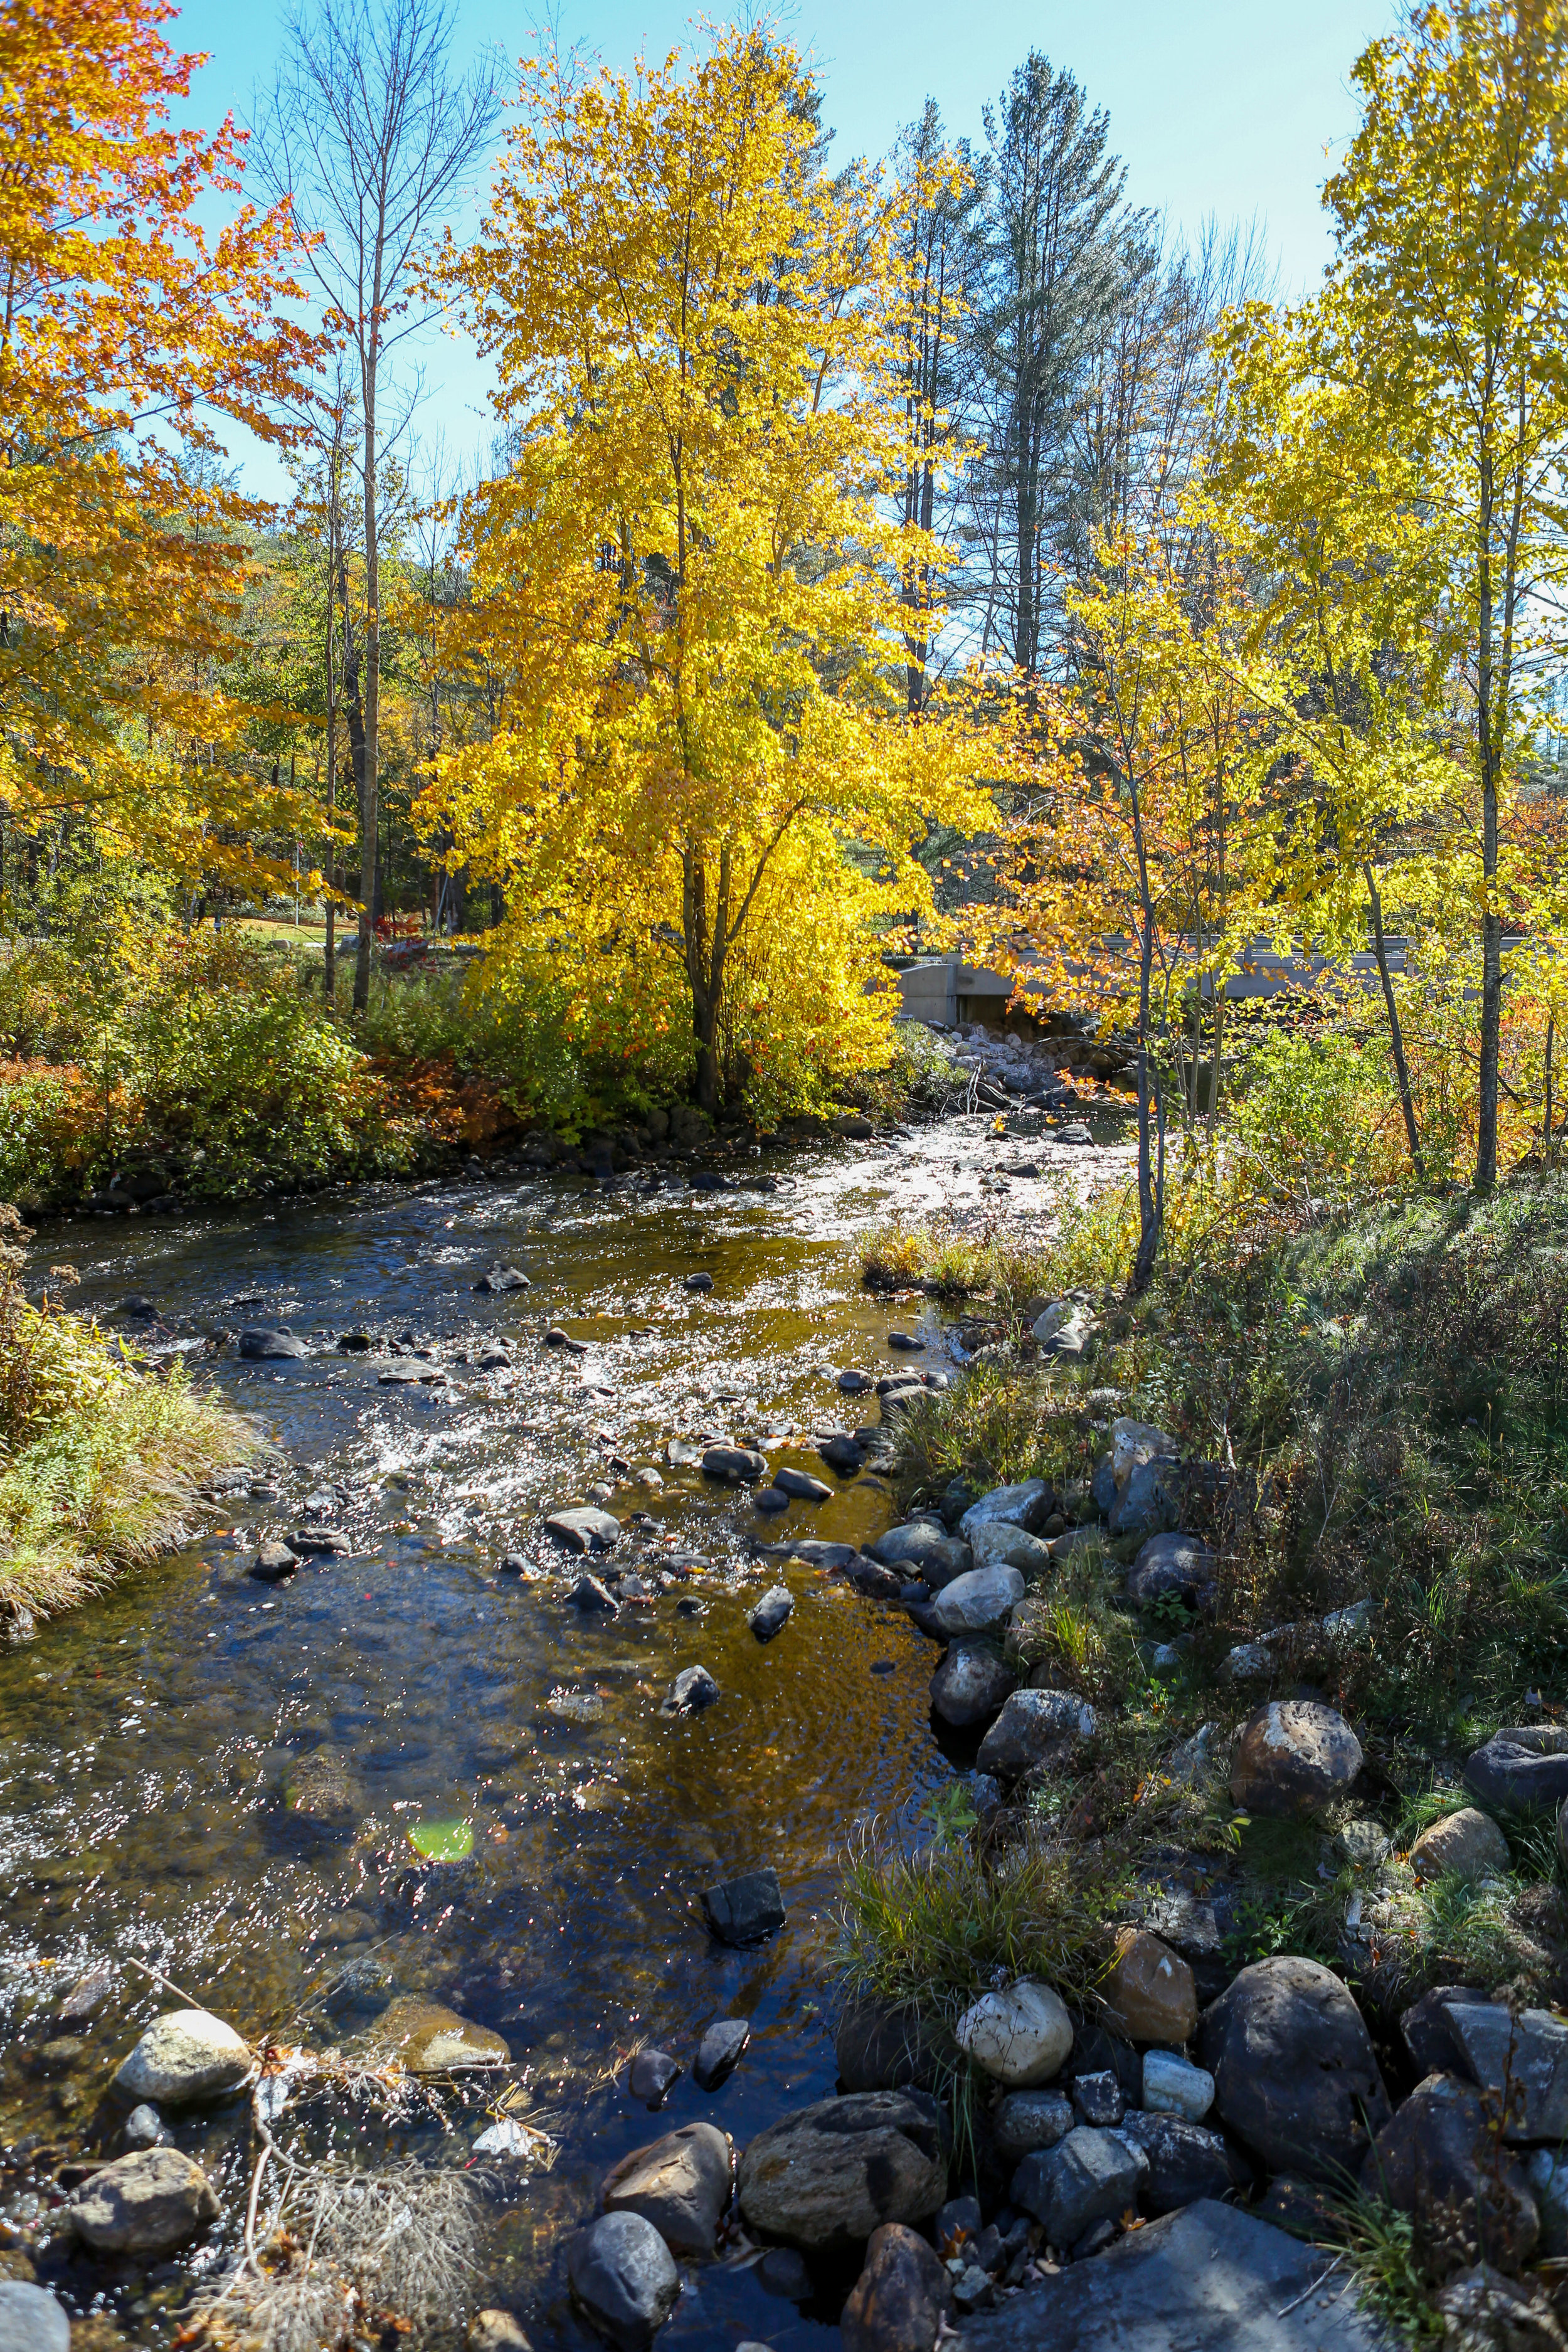
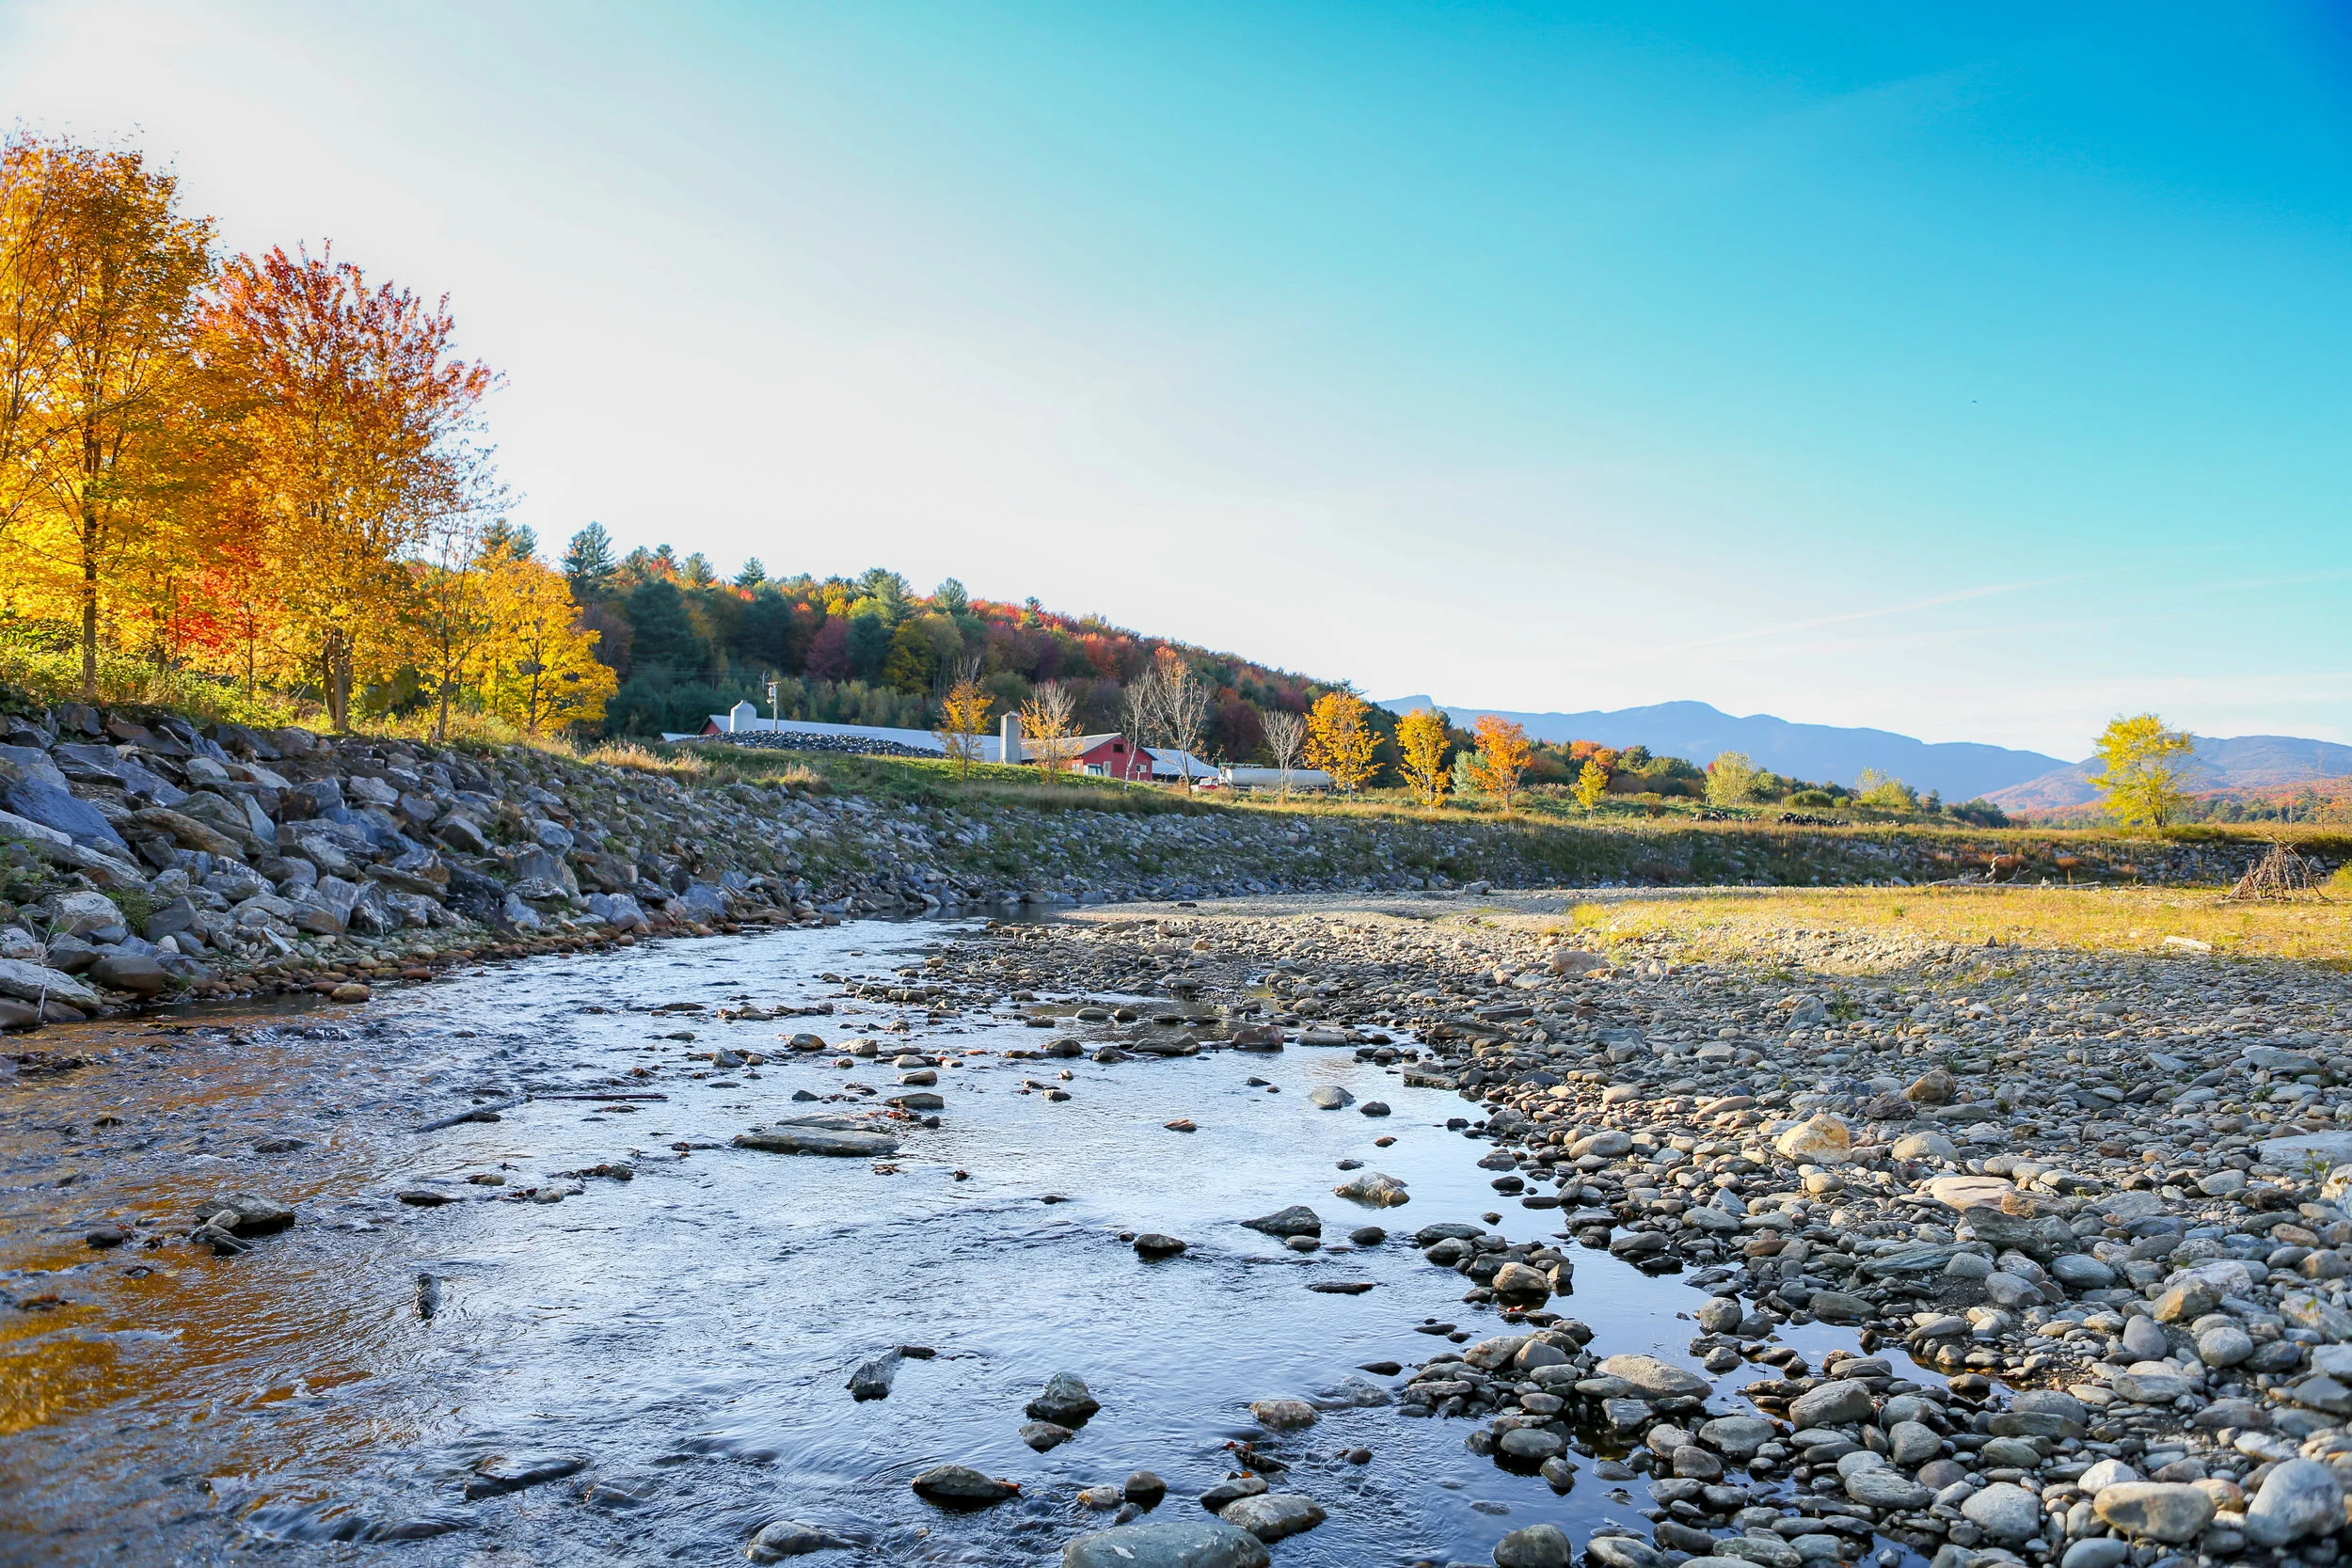
The first stop was at the Grafton Village Cheese Co, which was just outside of Brattleboro. This stop caught our eye because on the east side of the road was a good view of the West River. Lauren also wanted to say hello to the friendly donkeys and goats that were hanging around.

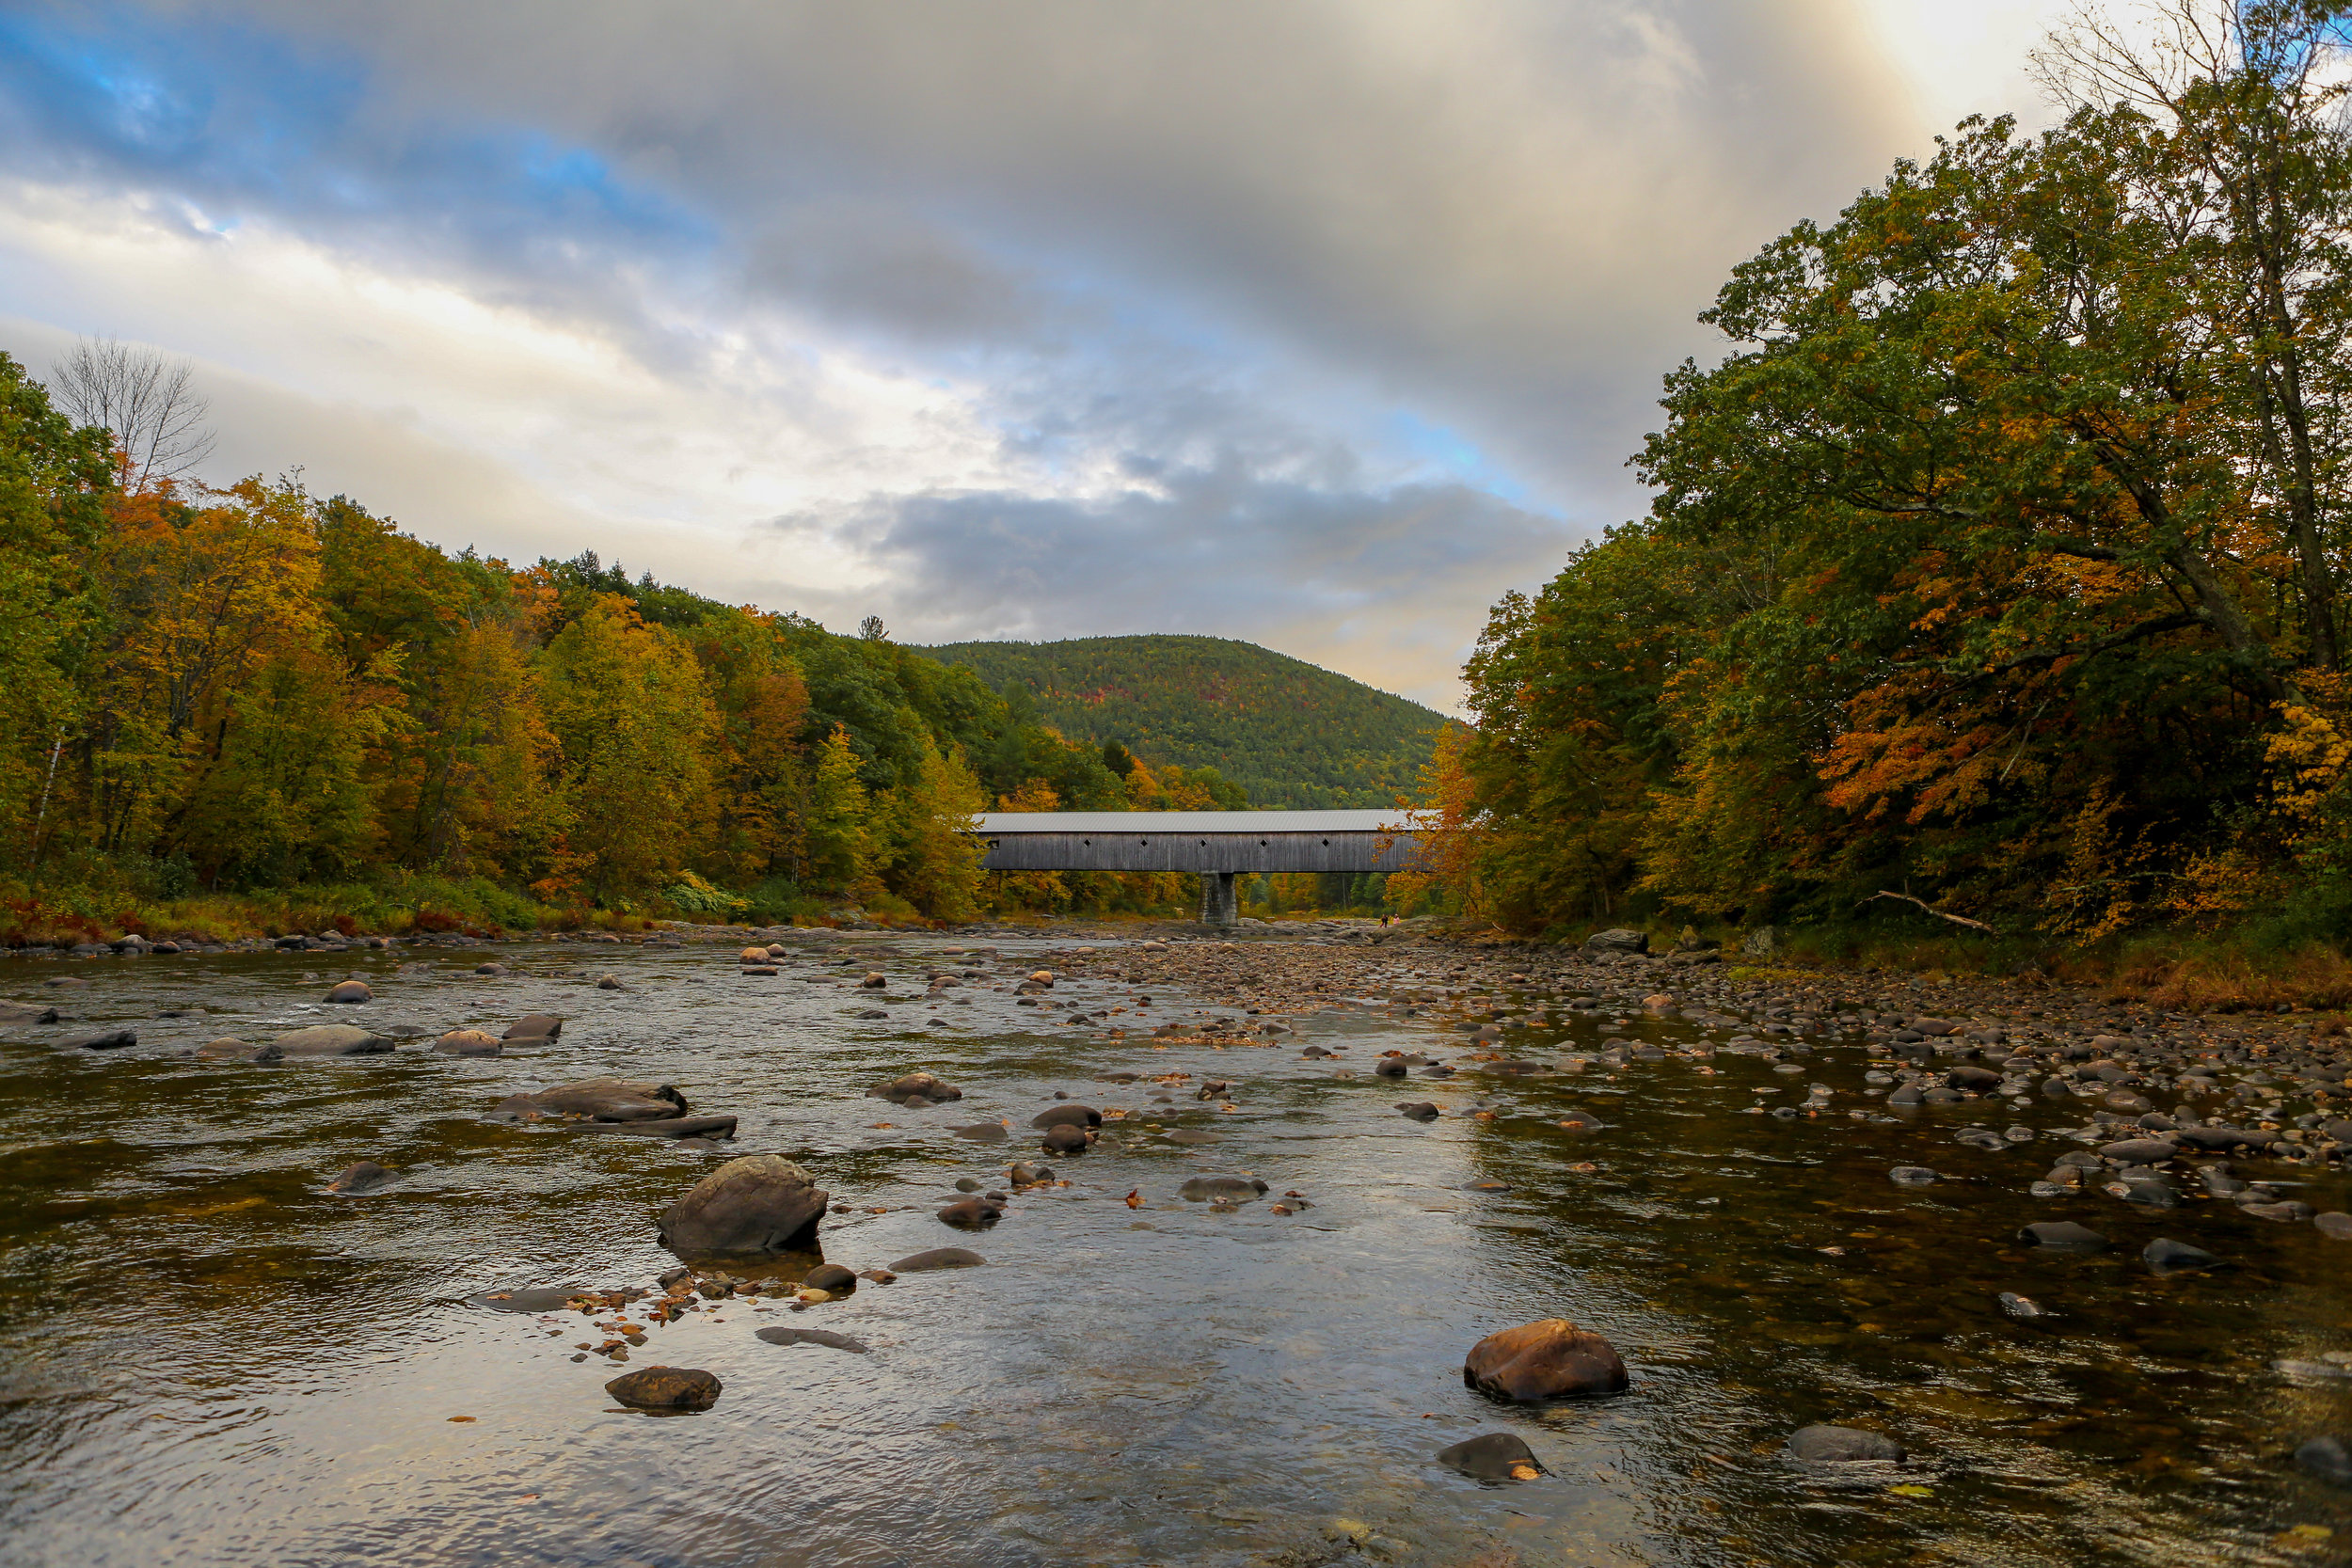
The next stop was at the Scott Covered Bridge. We walked around the river a little bit trying not to get our shoes too wet.

We reached our final destination, The Equinox, in Manchester right at dark. We had dinner at the hotel tavern; the shepherds pie and hot chocolate were delicious!

DAY 2

We first ran out to the Equinox Valley Nursery to check out their plants and scarecrow collection and had some delicious apple cider donuts! We hung around Manchester until the Orvis stores opened around 10AM so Lauren could get a scarf. There were tons of things to do in and around Manchester and if we ever go back, we will plan on spending at least a full day there. However we had to press on.

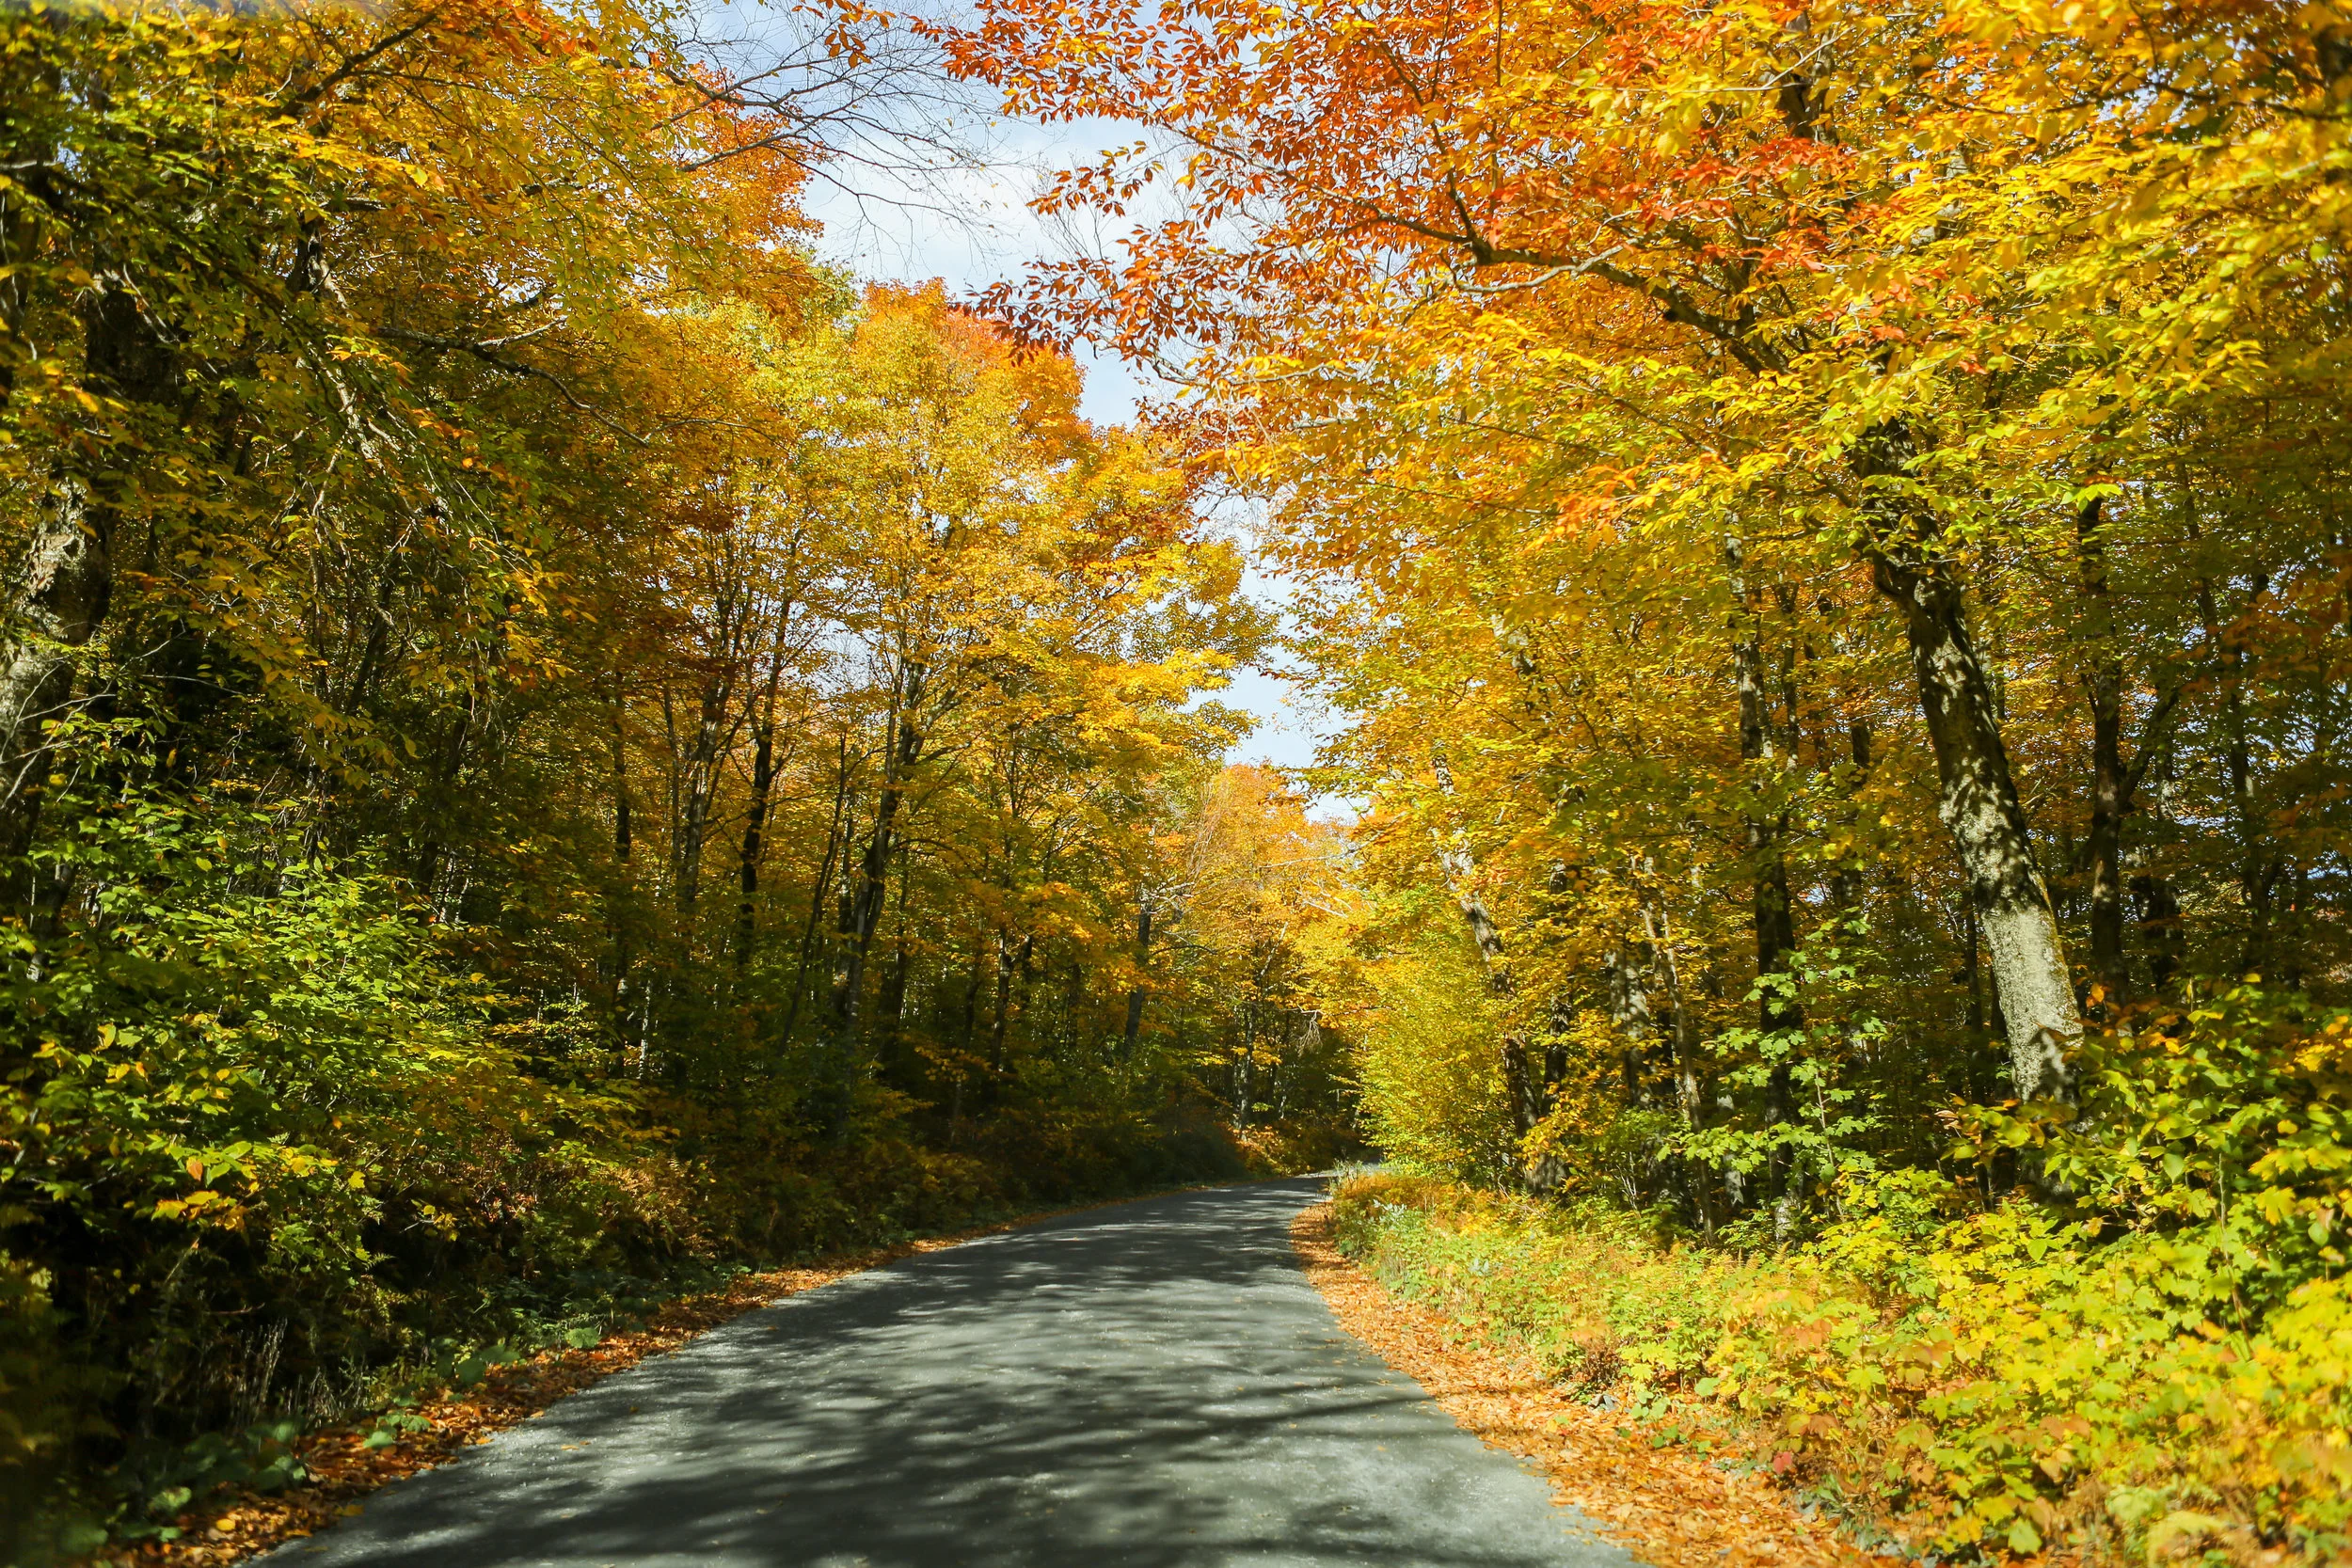
We made our way over to the Scenic route 100 and headed north. We would follow RT 100 for the rest of the day all the way up to Stowe.

First stop was the Vermont County Store in Weston. This place was awesome! Although it was a rather unassuming storefront, it is huge and has lots of good finds. I spent the most time sampling all the free cheese and dips.

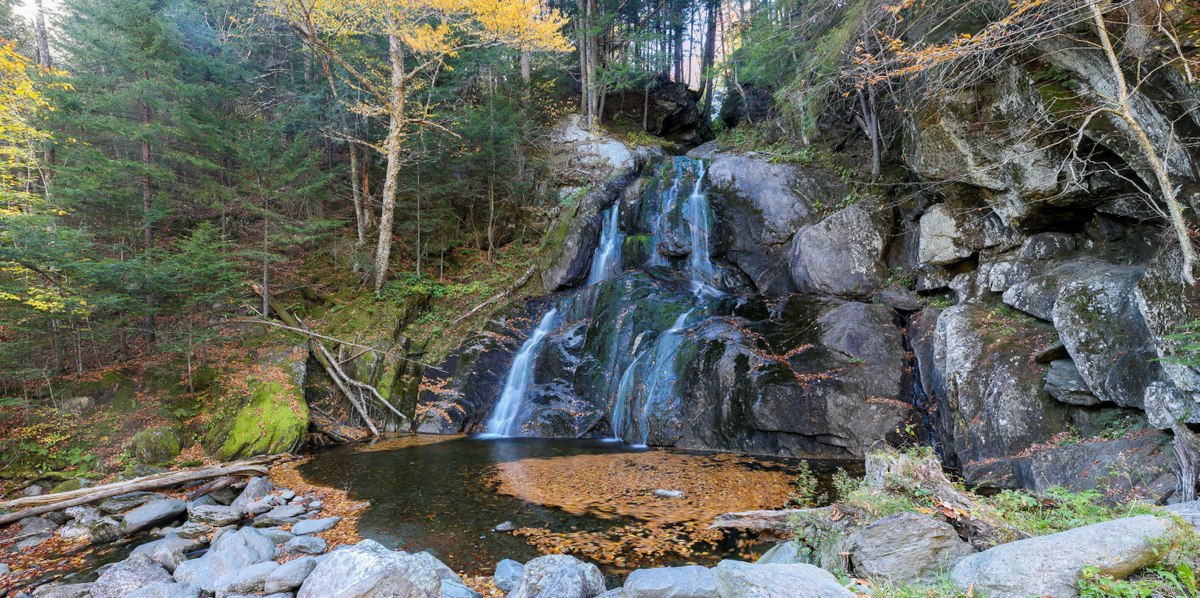
The only other planned stop was at Moss Glen Falls, just north of Granville, right off the RT 100. Otherwise the rest of the day we would drive until we saw something photo-worthy and pull off the road.

Final destination was the Stowe Mountain Lodge, which was huge and beautiful. It had a big heated pool and a few hot tubs that were welcome relief after the long day!

DAY 3

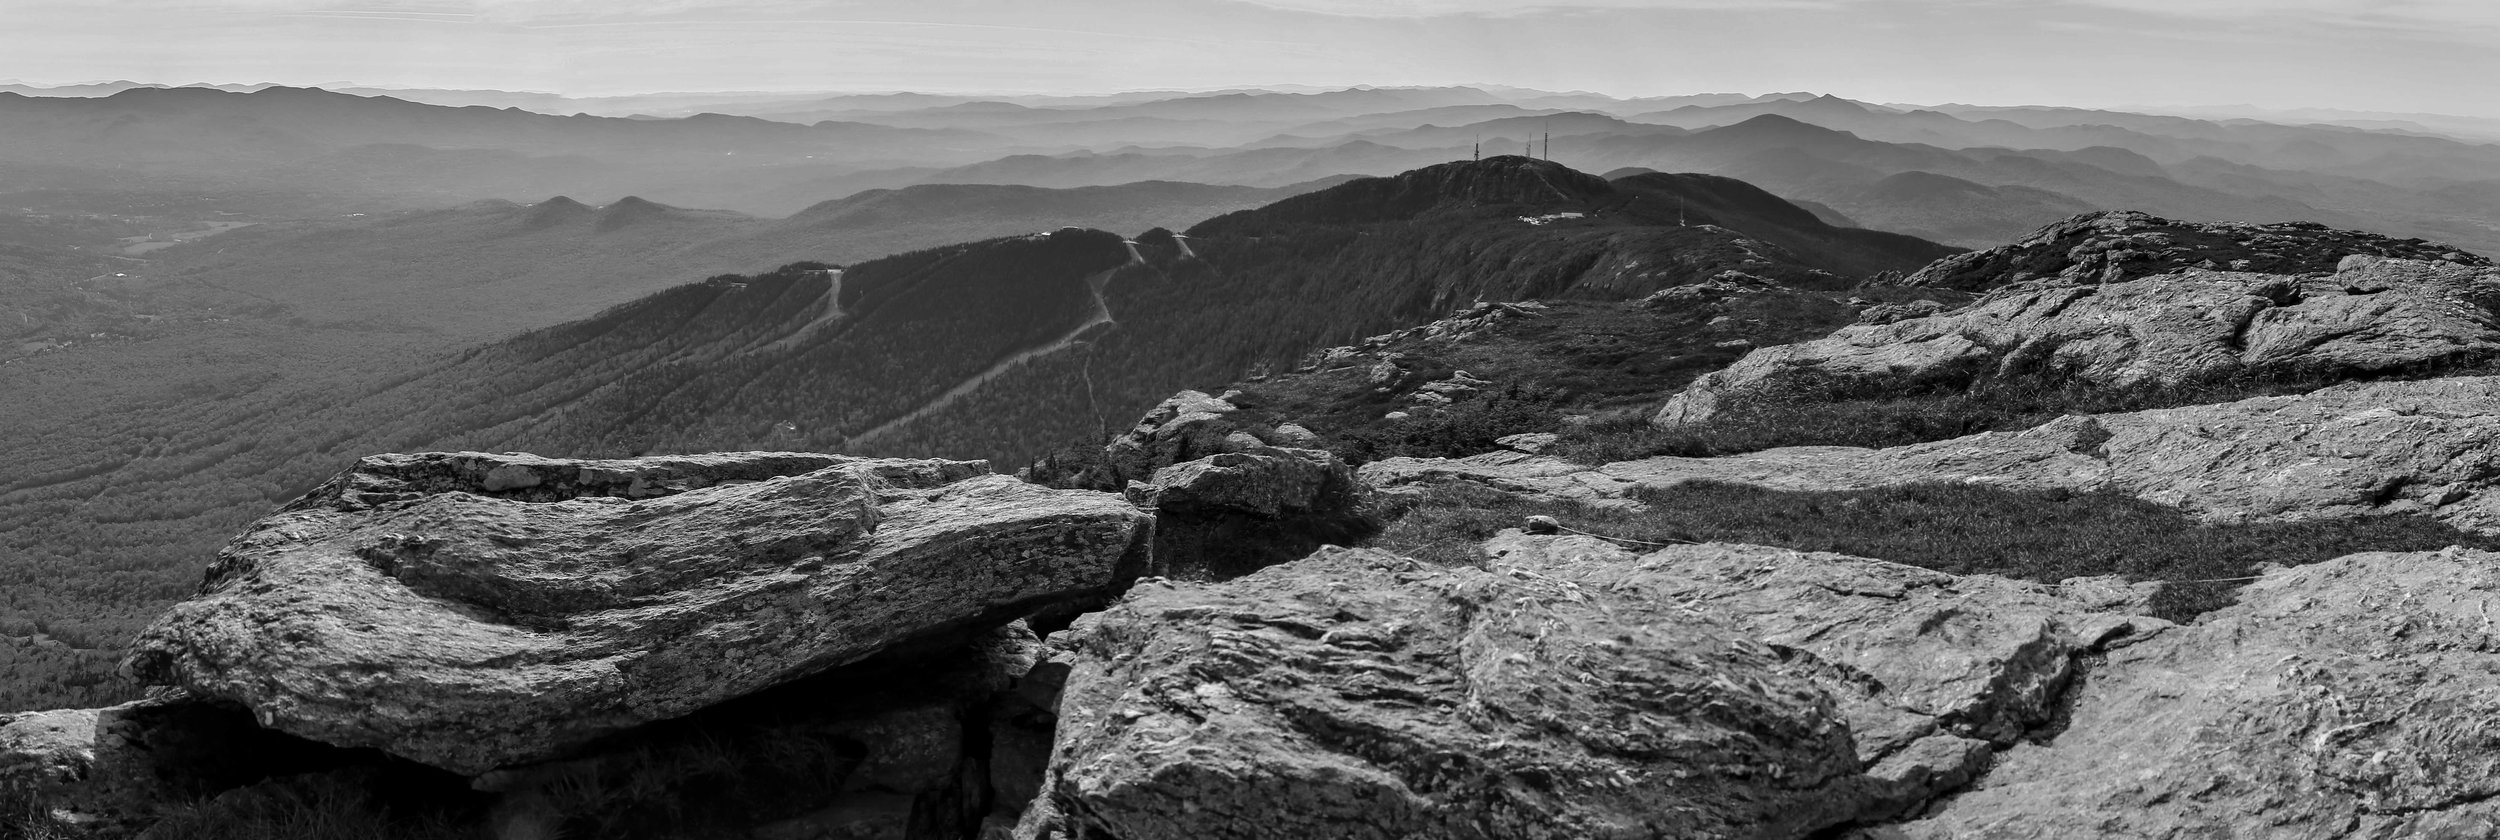
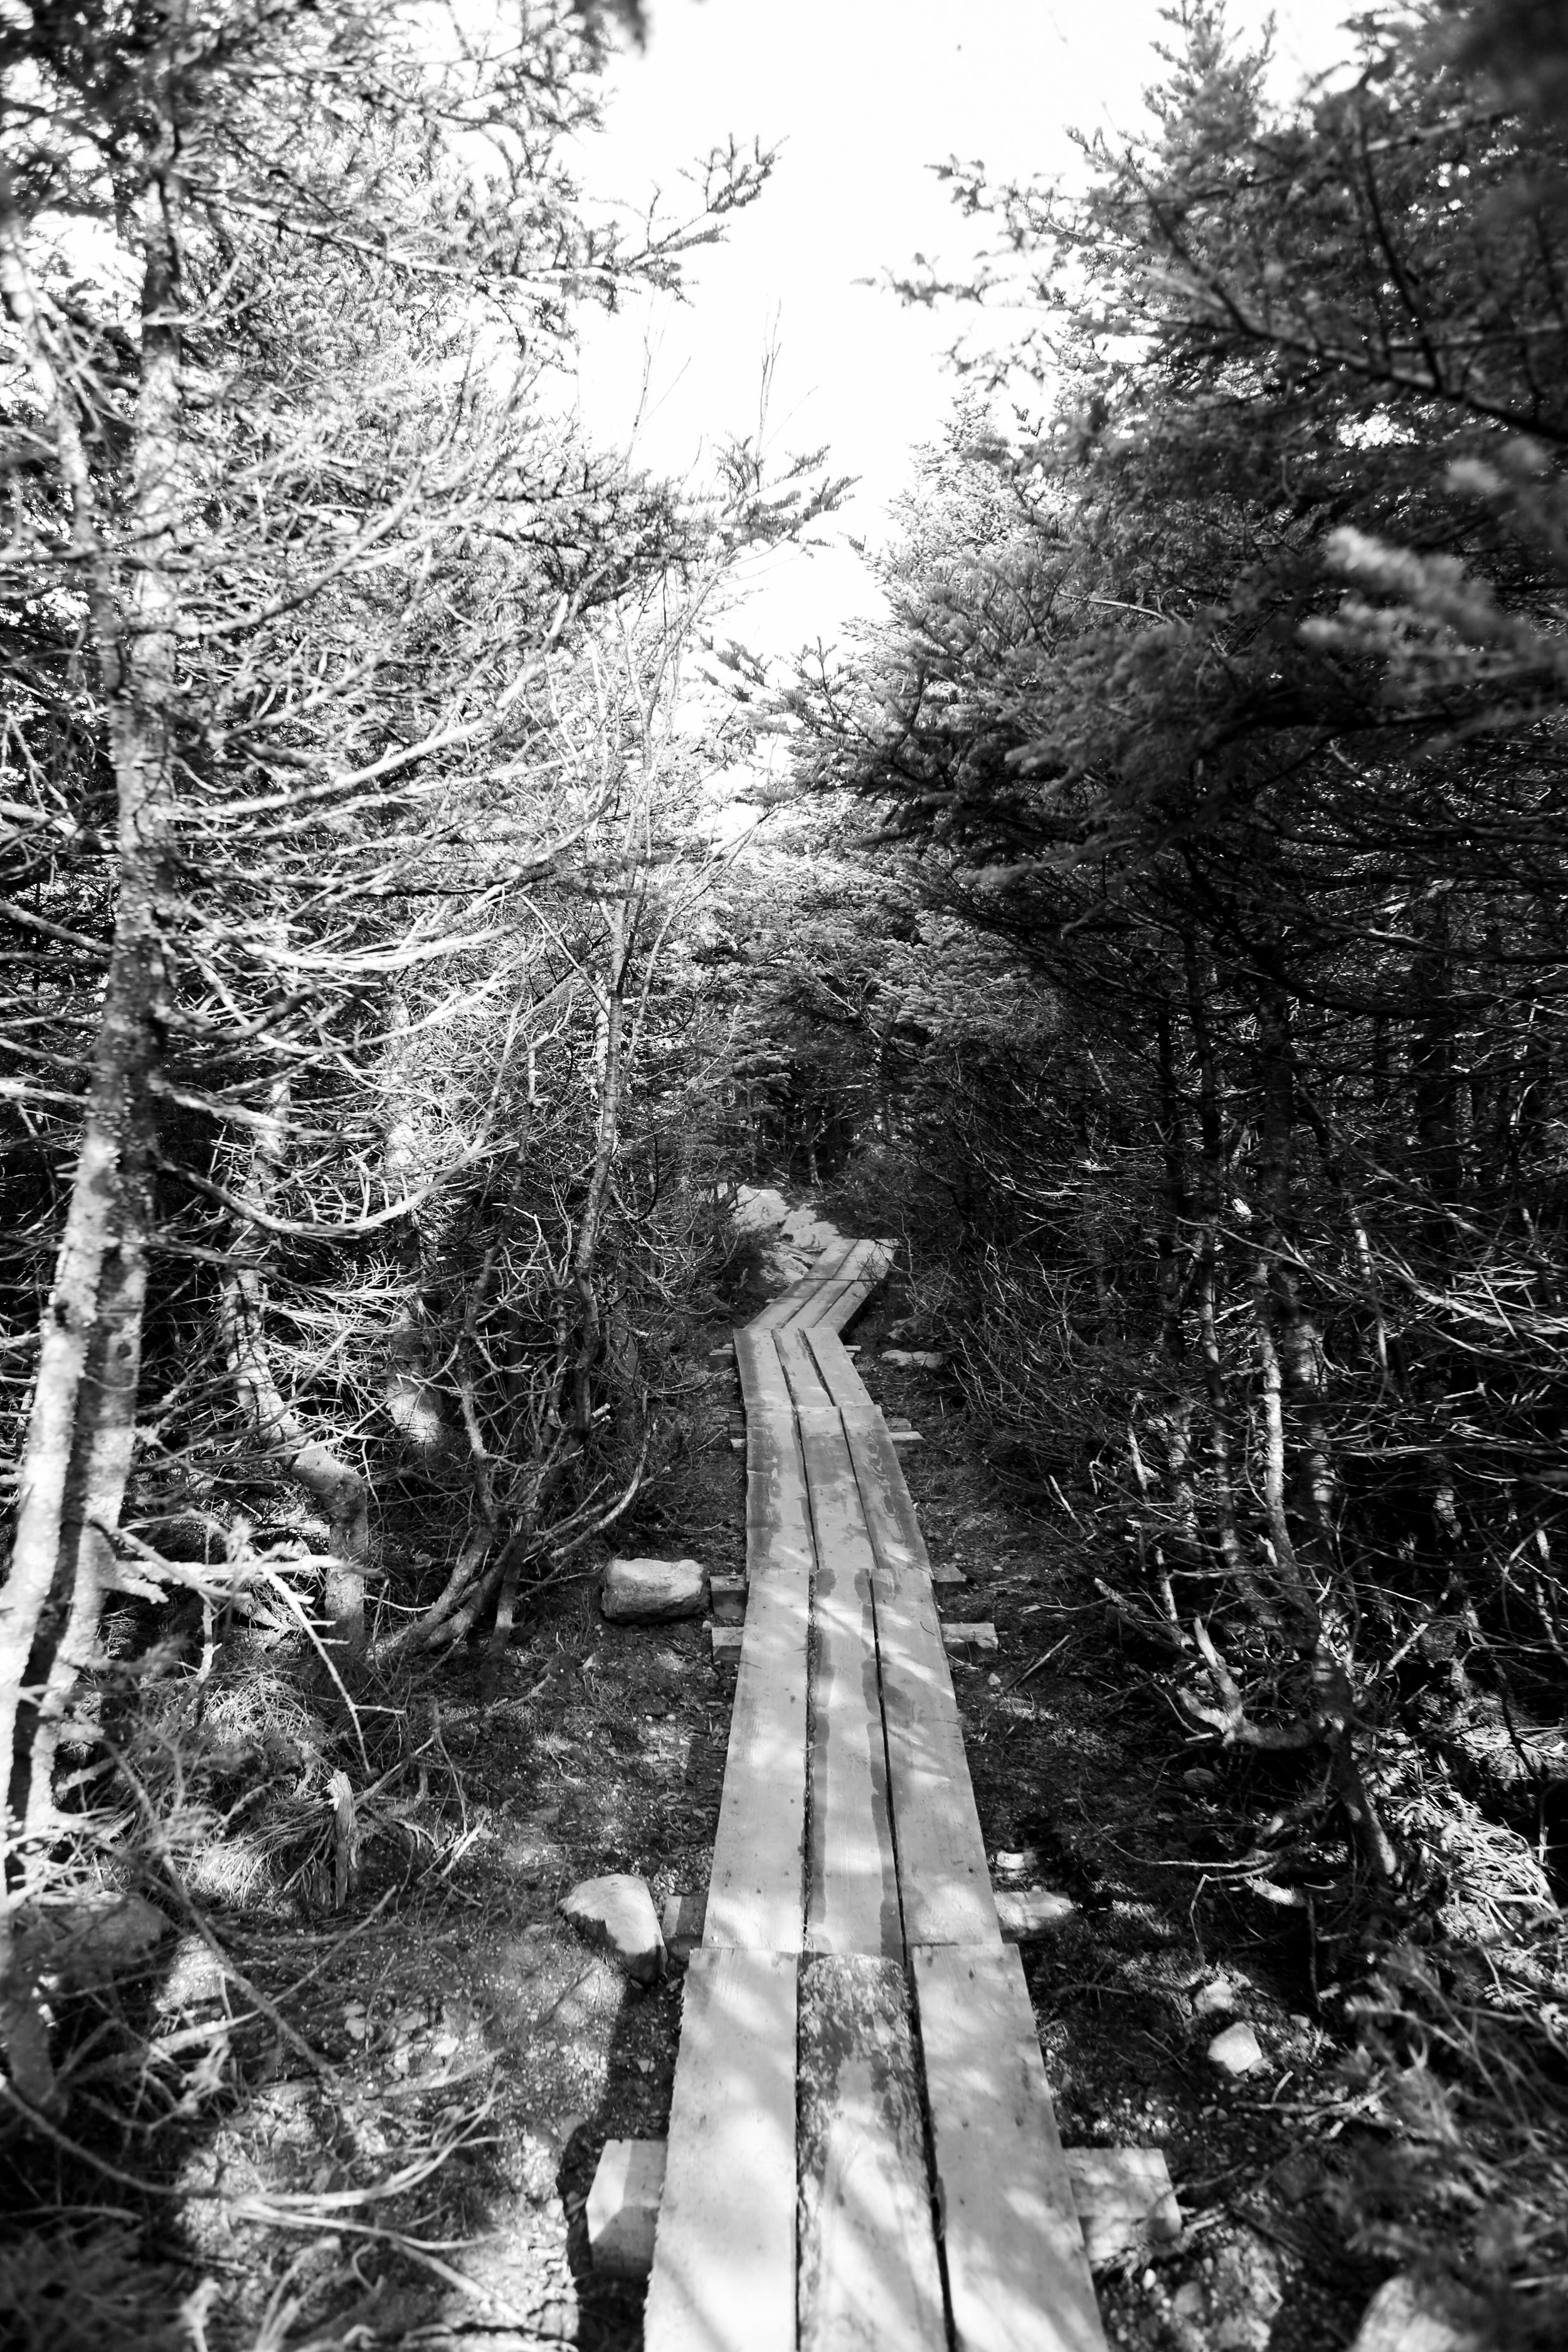
Grabbed our coffee and breakfast sandwiches and headed out. After some contemplation and help from the concierge we decided to take the Stowe Auto Toll Rode up the mountain, instead of the gondola. It was a GREAT decision! It is a short drive up to the mountain, then you can take a manageable 1.5 mile hike to the top of Mount Mansfield, the highest elevation in all of Vermont. Make sure you take some water and good shoes (we were ill prepared). Also definitely go up early because the parking is extremely limited at the top. When we returned to our car, there was a line of people just waiting to get a parking spot.

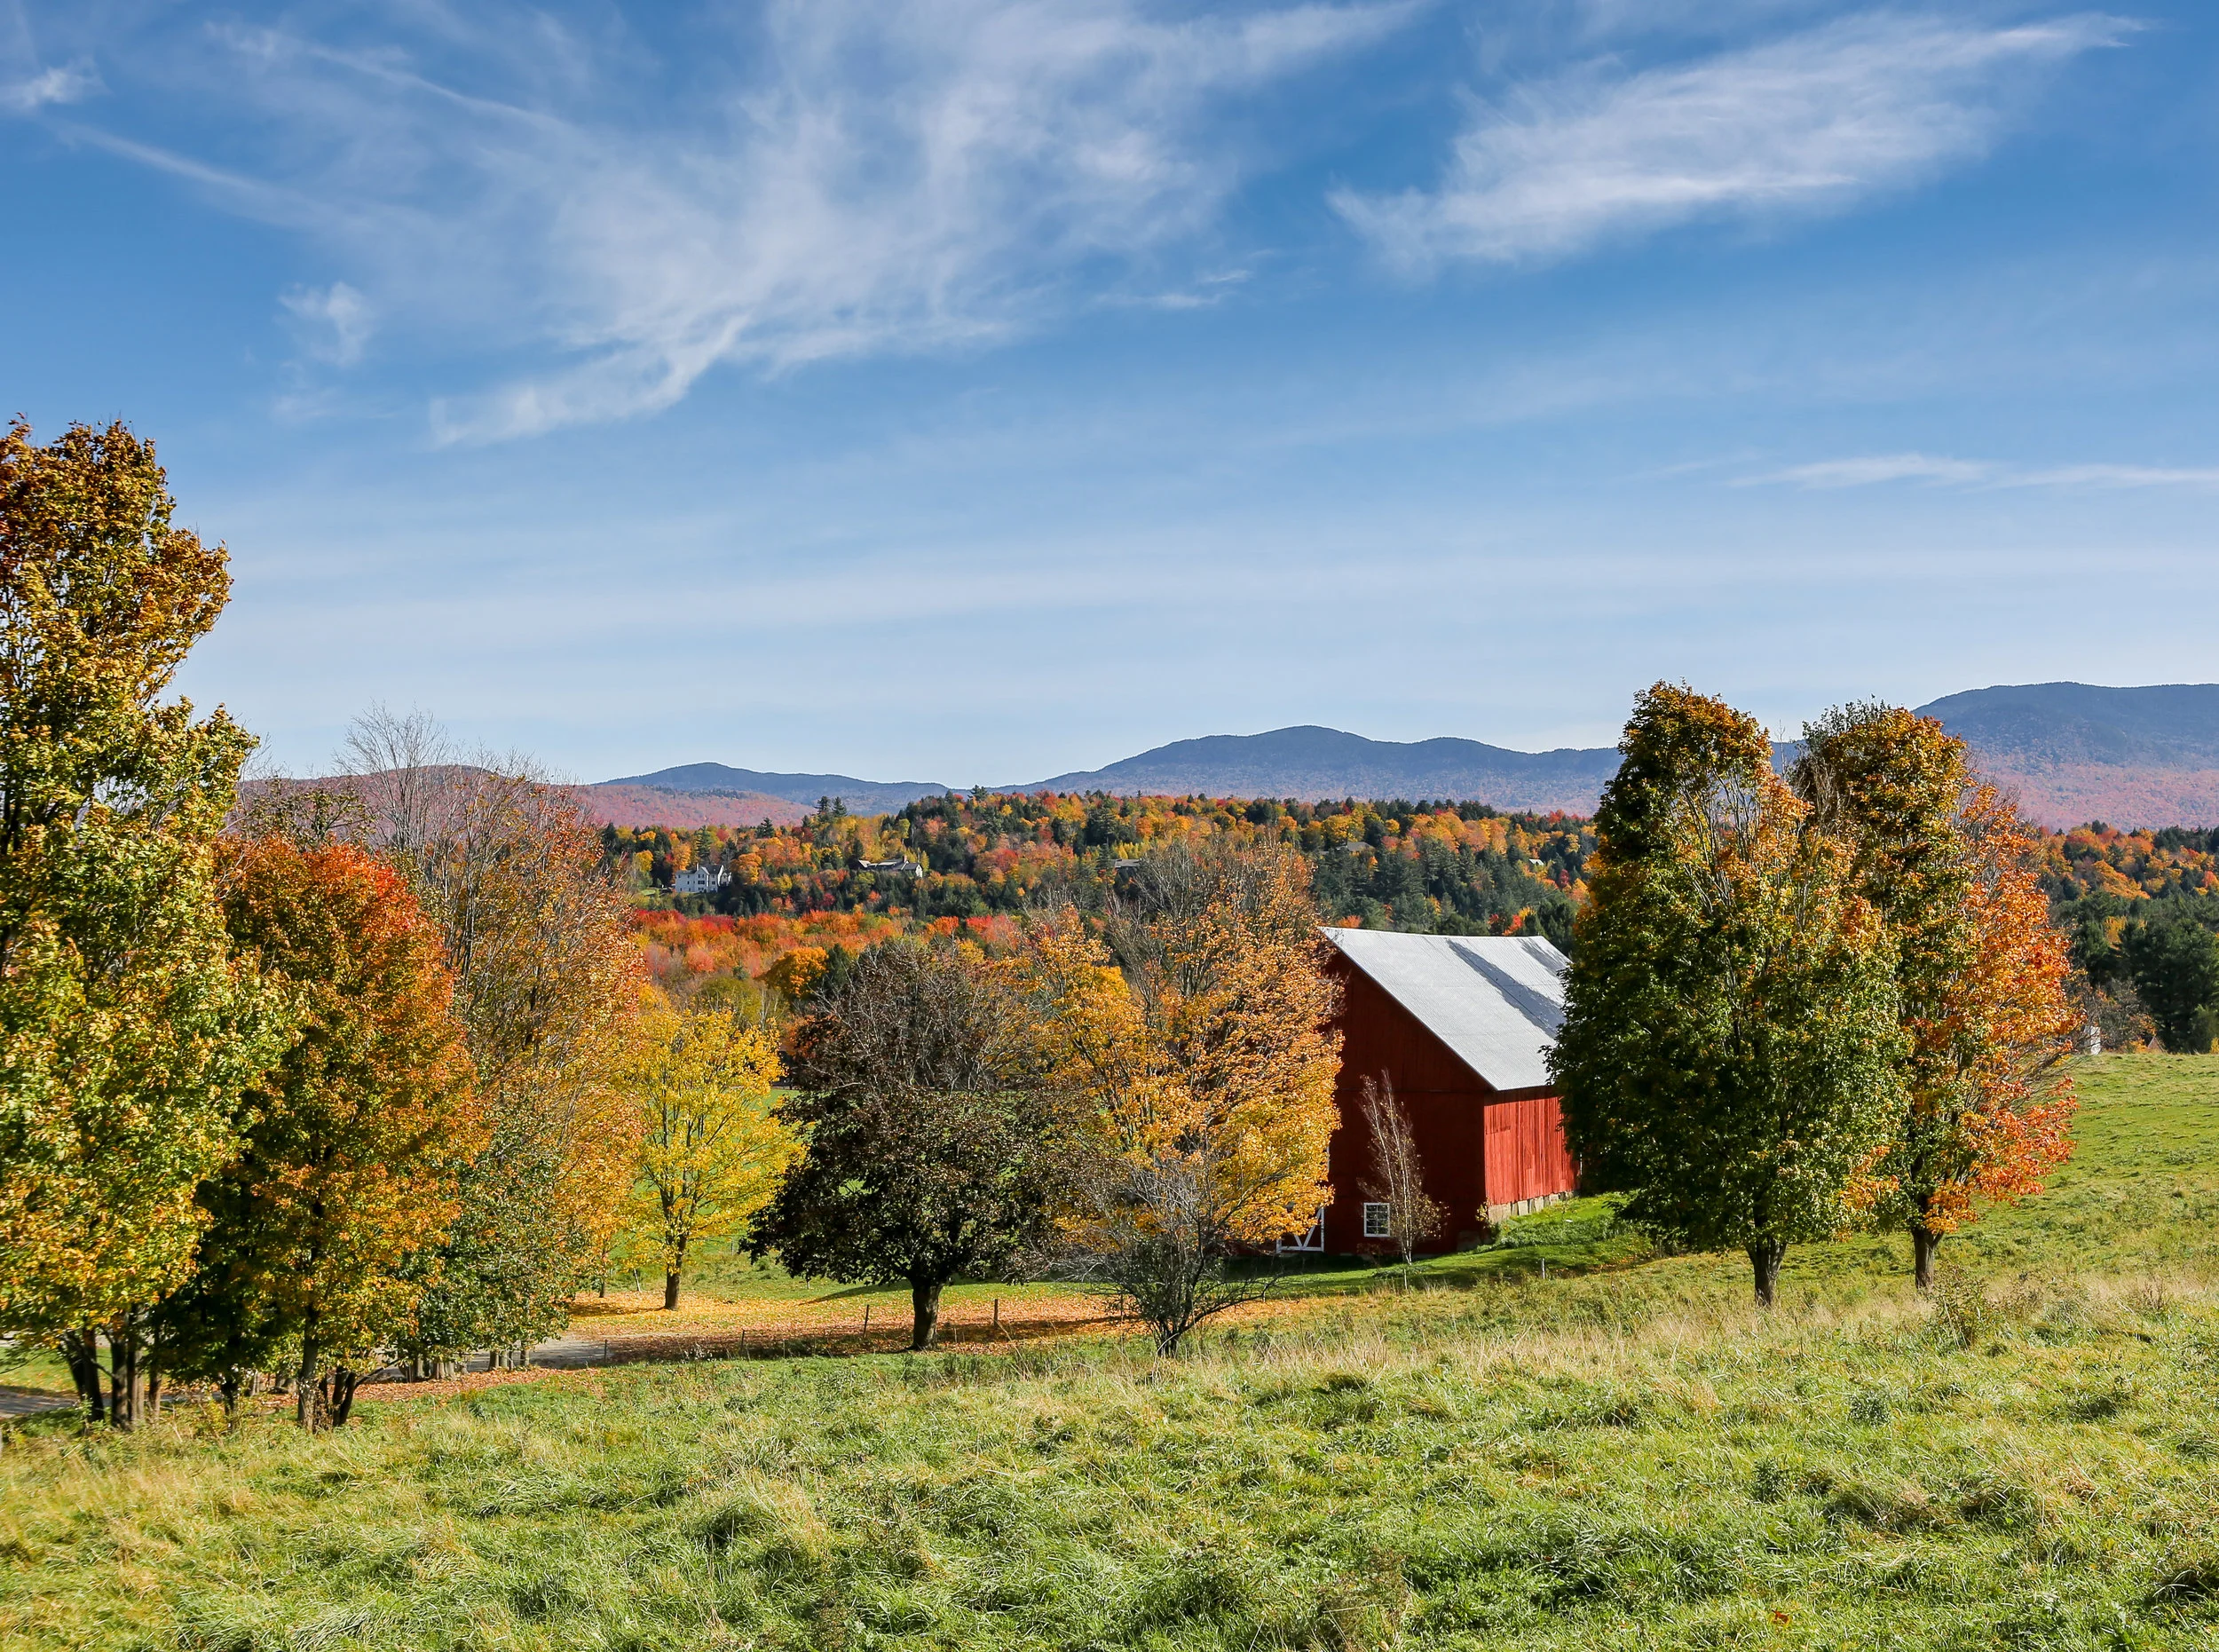
After we came off the mountain we headed over to the Von Trappe Family Lodge to look around. Then we stopped at a few more barns for pictures before heading to Montpelier. One of the barns is a relatively popular “Instagram” picture if you #stowe, but it is off the beaten path. It had to do some investi-Googling to nail down the location.

In Montpelier we went to The Skinny Pancake for a late lunch and it was fantastic! We walked around downtown for a bit and then hit the road one last time to finish the drive back to Boston.

DAY 4

Caught our flight back to Dallas. Ran my computer battery down to nothing editing all my pictures. Met with Lauren’s parents to get our boys back and headed back home!

Special thanks to Mike and Cheryl for keeping our little hoodlums and to the Perrys for letting us crash at their place the night before our early flight to Boston! 

Beach Long Exposures 2016

I only had a little time to play around with my camera last week when we were on vacation at the beach in Florida. I had taken my tripod down to the beach so we could take our own family portraits and decided to do some long exposure. Unfortunately I didn't have any of my polarizing or ND filters with me, so I was pretty limited.

I left my ISO at 100 and cranked down my aperture and was only able to get max of 1-2 second exposures, which mostly resulted in overexposed pictures.

Anyway it was just fun doing some experimenting and I think I got some interesting pictures.

Steel and Wood Desk "How To"

I have recently started reading more at night after the boys go to bed and found myself sitting at the desk in Lauren's little art nook. However, that big beautiful desk is where Lauren needs to work her art magic so I was politely given an eviction notice. This provided me the perfect opportunity to build myself a desk for Father's Day! 

After looking around I decided to go for the raw/industrial design and used a couple of websites to guide me along the way. The great thing about using the black steel pipe and building your own top is that everything is fully customizable. Keep that in mind because these plans can easily be modified to make a bigger desk, small dining table, or a coffee table.

My shopping list (gathered from both Home Depot and Lowes)

All of the pipe was 3/4" black steel pipe: 1 - 36in, 6 - 12in, 4 - 8in, 4 - 4in, 2 - 5in, 2 - 2in, 4 end caps, 6 Ts, 6 couplers and 4 flanges. 

The top was made from rough cut western red cedar: 2 - 8ft 2X8s and 2 - 12ft 2X2s.

The 2X8s were cut down to 48in pieces and only 3 were used for the top. The extra 48in piece actually could have been ripped down to a couple 2x2s and you would only have to buy one 12ft 2X2, but they were only $6 and I don't have a table saw, so I just saved the extra piece.

I evened up the 2X8s, clamped them together and screwed them in place on the bottom with a couple scrap 1X2s.

I ended up using a Kreg Jig to make pocket holes to attach the 2X2s. In hindsight I either should have made my pocket holes before attaching the 1X2s or put them closer to the center because I was difficult to make a few of the pocket holes with them in place. 

I am still leery when it comes to making anything that comes together at a 45 degree angle, but Lauren and I agreed that the trim would look the best that way. They always say measure twice and cut once, but I took a little different approach. After measuring each piece I would cut it a little long and shave off little bits at a time until it was just right. I did both the shorter pieces first and the longer ones second. I wanted to get as little of a gap at each joint as possible. These pieces were attached with pocket holes. 

Side note: the Kreg Jig is probably my most valuable tool in my garage. I use it on so many projects and nothing does the job quite like it does. I would recommend adding it your tool collection.

For finishing the top I experimented with a couple of things (unintentionally) and figured out what I think works best, so I will share that with you. Before doing any detailed work I had to use a belt sander since I was using rough cut lumber. I didn't spend too much time getting it really smooth because I knew I had a couple more rounds of sanding ahead of me.

I did have a few knots, chips and gaps that I wanted filled before putting on my polyurethane coats. I read a couple blogs and watch about using a clear epoxy to fill knots, etc so I decided to give that a shot. I bought Gorilla Glue clear epoxy, taped off a couple of areas and filled them in. It was easy to use and the packaging says "Sets in 5 minutes". Although since you have to sand these spots down, I read that is is recommended to let it cure for 24 hours at 75 Fahrenheit. Well I am inpatient and ended up waiting only about 12 hours, so these areas did not set all the way and they gummed up when I tried sanding them. I ended up using wood filler on all the other gaps and holes. I didn't feel like running the HD for the 4th time so I just used up the last of a light wood filler that was on my shelf, but I wish I had bought a darker filler. I didn't stain the top so the filler stayed light tan after the polyurethane was applied. See pictures below.

After all the wood filler set up, I went back and sanded everything really well. I used a belt sander then hand sanded with coarse and fine sand paper. During the polyurethane application I started out using those cheap foam brushes, but I thought these left a lot of bubbles. So on the 3rd and 4th coats I just wiped it on with a cloth. Make sure to lightly sand between each application.

Final desk top dimensions were 26.5 X 51.5 inches.

Now that the desk top was formed I put together all my pipes. I knew that I would be happy with the leg height, but I wanted to be sure that length and width of the base was appropriate. Fortunately I had taken up a whole aisle in Home Depot laying everything out before hand, so I didn't need to make any modifications. Both Lowes and Home Depot have pretty much every length from 2 to 12 inches, so it would be really easy to adjust the length, width or height to custom fit your needs. Actually the original design I was using had a single 18in for the legs above the "T" and like a 6in below the tee. However neither Lowes or HD had enough 18in pipes so I just improvised with what was available to get the height I wanted (details are provided below).

Legs from top to bottom: Flange, 12in, coupler, 8in, T, 4 in and end cap = 27.5 inches. 

Side supports from front to back: T, 12 in, T, 5in and T = 21.5 inches.

Middle support: T, 2in, coupler, 36in, coupler, 2in and T = 44 inches.

I tightened everything by hand as tight as I could. Then once everything was together I used some channel locks to tighten the legs at different sections so they would be equal height. Finally when the table top was attached I used the channel locks on the end caps to get everything level.

Total cost was about $150. I think that I got a lot better desk compared with what that same amount of money would buy at most stores. 

In summary I thought this was a really easy project with the right tools... a miter saw and Kreg Jig helped a lot. Again this would be really easy to customize to your own wants and needs. If you plan on making a dining table or coffee table I would recommend making your long bottom support centered between the two legs (rather than offset to the back like mine is). Also I really do think that a darker wood filler would have looked a lot better for this project. A live edge slab would look really cool if you have the resources to make one or the funds to buy it!

If you have any questions feel free to comment!  Make sure to check out some of my other "How To's" and Lauren's Art by clicking the pictures below.

Nathaniel 8.28.15

We met Nathaniel late last Friday night as he became the first born son to two of our closest friends. Everyone had been anxious and excited about his arrival for a while now. He must have been listening in and figured that out though because he decided to make his debut almost 2 months early. However, he was kind enough to let us take maternity pictures of his parents the weekend before. 

Friday night and into Saturday morning, Lauren and I had the honor and privilege to take pictures of Nathaniel, his parents and a lot of their family and friends. It was a pretty typical scene; a tired but glowing mom, a proud and nervous dad, beaming grandparents, aunt, uncle and even great grandparents. At one point there were about 30 people in that small delivery room peering over each others shoulders to get a glimpse of the little celebrity. You can see that his dad was pretty excited to share the story about how Nathaniel came into the world (it is by far the most remarkable birth story I have ever heard). 

The meaning of the name Nathaniel is "Gift of God; God has given". I haven't asked his parents if that was intentional, but it is definitely appropriate given the circumstances. It is also no coincidence that his birthday (8-28-2015) corresponds with Romans 8:28.

And we know that in all things God works for the good of those who love him, who have been called according to his purpose.
— Romans 8:28

I first learned that his parents were expecting one early Friday morning in the parking lot of a Cracker Barrel and remember thinking how blessed that baby would be considering the family he/she was being born in to. Nathaniel's parents are amazing, there is no question about that. First read the story of Abraham and Isaac and then I will tell you why.

Genesis 22: 2-12

2 Then God said, “Take your son, your only son, whom you love—Isaac—and go to the region of Moriah. Sacrifice him there as a burnt offering on a mountain I will show you." 3 Early the next morning Abraham got up and loaded his donkey. He took with him two of his servants and his son Isaac. When he had cut enough wood for the burnt offering, he set out for the place God had told him about. 4 On the third day Abraham looked up and saw the place in the distance. 5 He said to his servants, “Stay here with the donkey while I and the boy go over there. We will worship and then we will come back to you.” 6 Abraham took the wood for the burnt offering and placed it on his son Isaac, and he himself carried the fire and the knife. As the two of them went on together, 7 Isaac spoke up and said to his father Abraham, “Father?” “Yes, my son?” Abraham replied. “The fire and wood are here,” Isaac said, “but where is the lamb for the burnt offering?” 8 Abraham answered, “God himself will provide the lamb for the burnt offering, my son.” And the two of them went on together. 9 When they reached the place God had told him about, Abraham built an altar there and arranged the wood on it. He bound his son Isaac and laid him on the altar, on top of the wood. 10 Then he reached out his hand and took the knife to slay his son. 11 But the angel of the Lord called out to him from heaven, “Abraham! Abraham!” “Here I am,” he replied. 12 “Do not lay a hand on the boy,” he said. “Do not do anything to him. Now I know that you fear God, because you have not withheld from me your son, your only son.” 

A few weeks after that morning at Cracker Barrel, we found out that a boy was on the way. However, the ultrasound revealed some unexpected findings, which led to more testing and finally Nathaniel's parents got news that he had a condition called Trisomy 13. Unfortunately this meant that Nathaniel would not get to go home with his parents and that his time with them on earth would be limited.

Their response however is a modern day example of faith like Abraham. They were asked to surrender to the Lord a precious gift that had just been given to them. We never heard them ask "why God us" or "why our son?" Instead they spoke of how Nathaniel's life will be a cornerstone of their testimony and how it will draw them closer to God. They became living examples of how God's grace and mercy can turn anguish into hope and joy.

Their strength and trust in God was evident throughout the pregnancy and birth. Although we live in a world where perfectly normal babies are killed for merely not being wanted, Nathaniel's mom carried him proudly regardless of the eventual outcome. God's plan for them never included an "easy way out". I am sure any woman who has ever been pregnant can attest to her bravery and I am positive she would attribute that courage to God. One might have expected a solemn birth experience, but Nathaniel's birthday was filled with more joy and love than I have ever seen.

Nathaniel's parents never once withheld their son from God. They knew that their "Gift from God" was exactly that and that God's plan for Nathaniel was far greater than their own. They have displayed a faith like Abraham in a way most people are never asked to do. Obviously their task is not easy and I would encourage you to pray for them and their family as they wait to see their son again. 

How to Acid Stain your concrete porch

We had decided some time ago that we wanted to paint or stain our back porch, so it got added to the long honey do list. While we waited to get around to it, I did a little research to figure out exactly what I wanted to use. Some of the basic options out there include semi-transparent paint, water-based stain and acid-based stain. After weighing out all of our options, I decided acid stain was the best way to go. Sherwin-Williams sells a H&C Concrete Etching Solution in a variety of different colors and we ended up choosing Rusted Fence. (I originally bought Crumbled Brick, but after taking it home and doing a test spot we decided that it was too red/orange for our taste). I had approximately 400 square feet to stain and two bottles was plenty.

The first step of the process is just cleaning your concrete. Some places that I read recommended buying cleaning solutions, degreasers, etc.; however, I just powerwashed mine and that seemed adequate enough. Here is a look at the porch after I cleaned it.  

I powerwashed it the evening before and let it dry overnight. The next step was taping plastic to everything I didn't want stain on. I didn't have any brick that would be exposed, but I was told that brick is very susceptible to staining, so extra care should be taken if you will be staining next to brick.

Although you can dilute the stain to get a lighter finish, I did not. I honestly just didn't have the time to experiment and wait for more test spots to dry. I used a pump up sprayer to put it down and my dad helped by using a paint brush to cut in around the poles. You have to use an ALL PLASTIC pump up sprayer; any metal pieces will react with the acid in the stain. I started out spraying it on pretty thick, but quickly realized that at that rate I would have ran out of stain before I even finished half of the porch. All you really need is a thin even coat. If the stain is starting to pool, then you are probably putting too much down. I was pretty worried the entire time that I wasn't putting enough down and it seemed like the stain was a completely different color than I had picked out, but it won't look the way it is supposed to until the reaction is done.

As it starts to react and dry it will turn a different color and develop a powdery coat. I am not sure if the different color option have a differing looks when they are finished, but mine turned an orangish yellow. You are supposed to wait 4 hours for the reaction to complete. I waited more like 6 hours from the time I finished spraying. 

The next step is to wash off the powdery residue. This was one of the more fun steps because you finally get to see what the concrete will really look like. At first we were using a hose and broom to scrub the concrete. However, I ended up just using my powerwasher again on a low setting to remove the residue, which worked really well. You can see in the far right picture below how obvious a difference there is as I washed the yellow residue away. After that is all done, the next step is to wait for the porch to dry off. My porch is covered and the majority is shaded for most of the day. I finished washing it down around 4 pm and planned on putting the first sealer coat down at 9 pm, but decided I wanted to wait until the next morning so that it would be more dry. 

For a sealer I used H&C® Concrete Sealer Solid Color Solvent-Based (clear gloss) from Sherwin-Williams. It was recommended that I use two coats and each gallon is only supposed to cover 200 square feet. However, i only needed 1 gallon per coat  to cover all ~400 square feet of my patio. I did two coats of sealer, which really brings out the finish. I would definitely recommend waiting the entire 12 hours (as instructed) between each coat. I was in a rush and only waited about 7-8 hours. It seemed like it was extra sticky the second coat and if I didn't move fast enough some of the second coat acted like it was coming back up on the roller. 

IMPORTANT NOTE: With just the sealer the water would bead up on the porch and it was pretty slick when it got wet (our little guy got a bloody lip after slipping on it). I have since gone back and added another coat of sealer with H&C® SharkGrip® Slip Resistant Additive in order to make it less slippery and it worked great! So I would definitely recommend using the sealer + slip resistant additive for your last coat. 

You can tell from the pictures above that the sealer changes the finish from a dull brown to a more polished finish. Take a look at the finished product below. I wish I could have gotten some pictures before all the new dog footprints showed up, but oh well!


Total cost: 2 (Rusted Fence) Concrete Etching Solution + 2 gallons of Sealer + one bottle of Slip resistant additive = $240

Total time working time: 3 hours initial clean up + 2.5 hours taping off and staining + 1.5 hour cleaning up residue + 1 hour per coat of sealer (which was 2) = 9 hours of total working time. 


If you like this HOW TO then be sure to check out my GIVING TREE post and also check out Lauren's Etsy Shop for some awesome art!


Big Bend 2014

A few friends and I made our first trip out to Big Bend the first weekend in April. We drove into the park just in time to run into a visitor center and reserve a backcountry campsite for the following night. The first night  we stay in the Chisos Basin and went on the short Window Trail before dinner. There were clear skies that night for good star pictures. The following morning we set off on the trail. We wanted a more gradual hike up into the mountains so we took the Laguna Meadow trail up to the South Rim Loop. Unfortunately we couldn't take the Northwest trail because it was closed for Peregrine Falcon nesting... so we had to head back into Boot Canyon and hike another 1.5 miles straight up the Northeast Trail to our campsite. I was bummed that the skies were really overcast... I didn't get to get good star pictures while in the backcountry. I did however wake up and catch the "sunrise"; it was just a show of black and blues.

Anyway, enjoy some of my favorite pictures below!

Below is a collection of panoramas from the trip.

Gabe's Woodland Nursery

This is Lauren! I hijacked Preston's blog for this post!


Baby Gabe was born on rainy November 6th at 10:13 in the morning. He arrived a few weeks earlier than his expected due date, an early November surprise!

We have been praying for him ever since we found out about the tiny life inside me last March. In July we discovered our precious baby was a boy and Preston and I decided to create a Woodland themed nursery for him!

These past few months we have been eagerly awaiting his arrival and piecing things together for his room.  Friends and family joined in to help make our nursery extra special with their own unique creations. At the bottom of this post we listed where almost everything came from and the links for more details about them! We hope he enjoys his new home that so many people worked hard to make special for sweet baby Gabe. 

"For you created my inmost being;
    you knit me together in my mother’s womb.
 I praise you because I am fearfully and wonderfully made;
    your works are wonderful,
    I know that full well."

Psalm 139:13-14

Changing table dresser & basket: purchased from Junque in the Trunk in Waco, Texas. Gabe's dad, Preston, added the framing around the changing area on the dresser. 

Crib: Babyletto Modo

Glider: Bob Mills Furniture and Foot Stool: Target

Crib Mobile: Felt woodland critters handcrafted by Gabe's Nona Cheryl, the rest of the mobile put together by Preston!

Fox and Bear Stuffed Crib Lovies : Gabe's Nona Cheryl!

Woodland Art Prints: Created by Gabe's momma, Lauren!    click this to PURCHASE HERE

Cedar Side Table: Made by Preston from a stump in our backyard, see the tutorial here.

Crib Sheets: Made by Ricci Humphrey

Artwork Frames: Threshold Walnut frame from Target


The Giving Tree

We have been blessed with a lot over the last few months... among those things were the news of a baby on the way and a new house with an awesome back yard. In that back yard sat an old juniper stump that longed for a purpose.  

It was decided that this sad old tree would become a side table for our baby boy's woodland themed nursery! The first step was to chop her down and strip off all the bark. 

As you can see from the above pictures that I had a little help ripping off all of the bark, Wendy was very excited to be involved in the project. The real helper was a borrowed pressure washer that did wonders removing most of the bark. All of the nooks and crannies needed a little extra attention with a flathead screwdriver and hammer, but after a little elbow grease it was smooth as could be.  

Now for the hard part... getting it level and looking presentable.  I used some scrap wood to get the stump leveled as best I could and then nailed some 1/2 X 4 scraps to the top of the stump long enough to overhang so that I could attach the top. 

Before staining the top, I used a belt sander to rough up the edges to give it a more rustic feel. I then stained the top with Minwax Dark Walnut and covered everything with polyurethane.    


The glider that will accompany this side table is on its way, and after its arrival the nursery will be complete!

July 4th Rodeo (2013)

We were looking for something fun to do on our first July 4th here in Temple, and a busy lake just wasn't going to cut it. A short google search later and we found out the Belton rodeo was going on, so our plans were set. Here are some pictures of the action!

I know what you are thinking... What kind of July 4th post is this without fireworks?  Well apparently the Temple firework show is pretty legit so next year hopefully you will get your firework pictures!

Baby Spindle Announcement and Gender Reveal shoots

Well not too long ago we found out that we would be having a little one coming at the end of November... After the excitement/shock wore off we started brainstorming on how to announce our news. Most people who know us could have guessed that we would use our dogs in one way or another, but who would've thought we would transform Smitty into a great white STORK!!! 

I am lucky that I married such a crafty lady because believe or not you can't really find stork costumes for dogs! So off to Hobby Lobby we went and after some quick work with feathers, foam paper, and a hot-glue gun we had ourselves something to work with. For the background we used a blue twin bed sheet and for the clouds we used the guts from a cheap pillow!

Now for studio prep in our tiny Houston apartment... 

As you can see above, this is a very well put together "studio": backdrop tapped to the mantle and my umbrella just resting on the couch... I mean who needs 2 light stands anyway? I don't remember what my flash settings were but I just put them on manual and played with the powers until I got it how I wanted it.  

Next was the model placement... 

I had my lovely assistant kindly ask the model to "STAY". Which is easier said then done for sure! 

My framing was pretty wide, so it included a lot of junk around the backdrop, but that was easily cropped out afterward. So below is the shot we used...

We were pretty happy with the result, considering how hastily we put all of this together. The set up could obviously be improved: ironing/stretching the backdrop, better wing position, etc. The funny thing is that there were a lot of people who didn't even realize that was a dog when we posted the picture! Smitty was an awesome model and was rewarded with a spoonful of peanut butter!


Of course it was only natural that we would use our two canine children again when it came time to reveal the gender. We actually took these pictures the night before we found out, and at this point in time we had moved out of our Houston apartment and into our house in Temple! So our "studio" took on a little different look this time around.

This time we just hung a white fleece blanket from a curtain rod and placed my umbrella on a spare chair. The 580EXII was in the softbox and my yongnuo flash was just laying in the chair and reflecting off the inside of the umbrella. It obviously takes a little while to get the right shot, below are a couple of interesting captures along the way...

Finally we got a couple we liked...

Lauren posted these to Facebook and asked people who they thought would win. Team Smitty vs Team Wendy... later that night after many confident wrong and right guesses, the answer was revealed! We are having a BOY!!!

Switzerland

Well after sifting through about two thousand pictures I have finally narrowed them down for your viewing pleasure! I grouped the pictures into 5 different galleries, so be sure to scroll down and check them all out (Especially the last gallery, a collection of panoramas from the whole trip)! 


Up first is the Lauterbrunnen Valley Gallery. In this gallery you will find lots of waterfall pictures, which is to be expected from the valley of 72 waterfalls. You will also see many other amazing sites both small and large just steps away from our amazing flat in Lauterbrunnen. 


Next up we have a compilation of pictures from Wengen, a ski town overlooking the Lauterbrunnen Valley; Murren, another ski town on the opposite side of the valley; and our journey to the Jungfraujoch, the highest elevation in Europe you can get to by train. 

The next gallery is smaller in comparison to the rest, but the views make up for the lack of pictures. This gallery is mainly pictures of our hike to Lake Bachalpsee high in the swiss alps. We were afraid that there would be no view at the top due to cloud cover but as it turns out we ended up higher than the clouds so all was well! Check out the panorama gallery for even more grandiose views!

In the gallery below you will find pictures from our visits to Lucerne, Brienz, and Thun. Included are images of The Dying Lion, a gorgeous church, some very camera loving swans, and some weary train travelers. Also we happened to be in Brienz as the Tour de Swiss was passing through! 

Okay, this last gallery is just a collection of panorama's from the trip. Views from Murren, others from the top of the Jungfraujoch, and also Lake Bachalpsee! 

I hope you enjoyed the pictures! A special thanks is due to Mike and Cheryl Clevenger, who took Lauren and I to this amazing country. If you ever have a chance to visit Switzerland, then make sure to head over to the Bernese Oberland because these pictures don't even do it justice! 

Temple Macro

Here are some critters that I have chased down with my new lens!

Minnesota 2013

We were in Minnesota about a week ago to fix up the Clevenger's new lake house and I got a chance to try out a new graduation present! Hopefully you all will enjoy it as much as I do... say hello to the new Canon 100mm f2.8L. Thanks to my parents and grandparents for making it happen :)​

Will Model for Food

Well I found myself a little bored tonight and decided to practice/experiment with some off camera flash. So I armed myself with a speedlight, yongnuo triggers, a westcott apollo 28" softbox, a reflector, my camera, and most important of all.... DOG TREATS! ​With the addition of the last item on my list I instantly had 2 willing and motivated models at my disposal!

​Considering our logo is a bird dog (hopefully that explains the feather inside the point dog), inspired by our two setters, it seemed necessary that they should each have some proper portraits! 

Here they are lined up and ready to go as I tested to make sure my flash was synced!

(Left)- Wendy, our Gordon Setter  (Right)- Smitty, our English Setter

Below is a gallery of their portraits, enjoy!

Next time we may have to have a hair stylist on set for Wendy.

Brazos Bend State Park (2013)

Camera Lesson

Understanding Your Camera: A lesson in aperture, depth of field, exposure and shutter speed.

Your photography will change for the better as soon as you can get away from the “automatic” modes on your camera. Hopefully with this tutorial you will be able to better understand how your camera thinks and how you can use it to create the images you've always wanted.

Specifically I want to teach you how to use the “Av” mode on your camera. This stands for aperture priority, which means that you are in control of the aperture and the camera does the rest of the work for you. This lesson comes with pictures, but first we have to go over a few simplified definitions.

Exposure: amount of light allowed to fall on the camera’s sensor during a photograph

-Decreasing the exposure makes pictures darker and increasing exposure makes them brighter

Aperture: the hole or opening through which light travels (displayed as a “f” followed by a number)

-A large aperture (big hole) is denoted by a small “f” number. A small aperture (small hole) is denoted by large “f” number. For example f1.4 is a large aperture and f16 is a small aperture  

Shutter speed: amount of time the camera’s sensor sees the light (displayed seconds)

Depth of field (shallow): only what you choose to focus on will be in sharp focus

Depth of field (deep): all objects in the photograph are in sharp focus

Here is a representation of the different apertures. Remember that these are located within your lens, not the camera itself, and not all lenses have really large apertures. Your lens will have largest aperture capable printed on it somewhere.  


edited.jpg

Okay, so why would we want to change the aperture and what happens when you do? Well it’s time to combine a few of those definitions, so if you get lost just refer back to the top.  

Every time you take a picture your camera thinks about how it can make the image at the exposure that you set. In most instances your exposure is set to “0” as shown below.

IMG_0801-001.jpg

So with each picture your camera is gathering the amount of light required to make a “0” image for you. So how does aperture and shutter speed come into play?

Think of it like this… you have a milkshake that you need to drink and you have the choice of two straws. One of the straws is really fat (f1.4) and the other is really skinny (f16). Now with both straws you will be able to drink all of your delicious milkshake, but you will be able to do it a lot faster if you choose the fat straw over the skinny one.

Photographs work the same way. Choosing a large aperture (f1.4) means that the camera will give you a really fast shutter speed and choosing a small aperture means that the shutter speed will have to be slower in order to “drink” the same amount of light. Here are some pictures to show what I mean.

camera lesson edited.jpg

In these pictures I was focused on the mug and was in “Av” mode; don't pay attention to the ISO setting (that is for another day) . I was only in control of the aperture and the camera chose the shutter speed for me. The top picture was taken with the largest aperture (f1.4), so the camera set the shutter speed to 0.02 seconds. As you can see when I decreased the aperture to f4, f8 then f16 the camera had to slow down the shutter speed each time in order to drink up all the light that I wanted it to.

From these series of images we can also learn about depth of field. As the aperture went from large (f1.4) to small (f16) the depth of field got deeper. In the first image with the aperture set to f1.4, only the mug and the other things at the same distance from the camera were in focus. As I moved the aperture to f4 you can start to see that the pumpkin in the background is getting a little sharper, but the backdrop is still out of focus. At f8 the backdrop gets a little sharper and by f16 the objects at all distances from the camera are in sharp focus.

But what happens if you change the exposure away from the “0”? By moving it to the left (towards the negative numbers) you are saying to your camera that you want the picture to be darker and by moving it to the right (towards the positive numbers) you are saying you want your pictures brighter. Take a look below… the left hand column is set to an exposure of (-1) the middle at (0) and the right hand column is set to (+1).

camera lesson edited.jpg

As you go down each column the aperture is getting smaller, so just like in the first example the shutter speed is slowing down. Yet you can also see that each row has the same aperture, but the shutter speed is getting slower as you move to the right. Why is this happening if my “straw size” isn’t changing? Well by setting the exposure to “-1” you are only getting a small milkshake, at “0” you get a medium, and at “+1” you get a large. So yes you have the same size straw for each milkshake, but you can finish a small milkshake a lot faster than you can finish a large.

That’s all nice and fancy, but how is all that info practical when I go out and start taking pictures?

  • Is your background ugly or boring? If yes, then make your aperture larger so that your background is not in focus.
  • Getting blurry pictures because your shutter speed is too slow? Make your aperture larger so that you can drink up that light faster and your pictures won’t be blurry.
  • Taking a group picture and the people in the back aren't in focus? Decrease your aperture so that everyone will be in focus.   

I hope that you were able to learn some camera basics from this tutorial! There is a lot more to learn, but everyone has to start somewhere! If you can grasp the concepts above, then you are well on your way to mastering your camera!

All images above were unedited and taken with a 5D Mark III with a Canon 50mm f1.4 lens.